3.3 Dify 创建一个“AI 文本生成”应用
文档摘要
3.3 利用 dify 制作 wordpress 标题生成插件 声明:原文来自苏洋大佬的blog 使用 Dify 和 Moonshot API 构建你的 AI 工作流(一):让不 AI 的应用 AI 化 我们在此之上加了一些解释以及修改。 本节将为 WordPress 开发一个插件功能,可根据文章内容自动生成标题,其中标题自动生成功能由 dify api 提供。 3.3.1 dify 创建 AI "文本生成应用" 要求创建一个文本生成应用:可以根据文本内容,生成合适的标题。 1.配置 dify 语言模型 要正常使用 dify,必须先配置好 dify 背后所使用的语言模型,可以根据自己的习惯选择任意语言模型。在 dify 中初始化模型配置的大致步骤如下: 登录 dify,点击头像选择“设置”。
3.3 利用 dify 制作 wordpress 标题生成插件
| 声明:原文来自苏洋大佬的blog 使用 Dify 和 Moonshot API 构建你的 AI 工作流(一):让不 AI 的应用 AI 化 我们在此之上加了一些解释以及修改。
本节将为 WordPress 开发一个插件功能,可根据文章内容自动生成标题,其中标题自动生成功能由 dify api 提供。
3.3.1 dify 创建 AI "文本生成应用"
要求创建一个文本生成应用:可以根据文本内容,生成合适的标题。
1.配置 dify 语言模型
要正常使用 dify,必须先配置好 dify 背后所使用的语言模型,可以根据自己的习惯选择任意语言模型。在 dify 中初始化模型配置的大致步骤如下:
- 登录 dify,点击头像选择“设置”。
- 在左侧菜单选择“模型供应商”,查看可用模型。
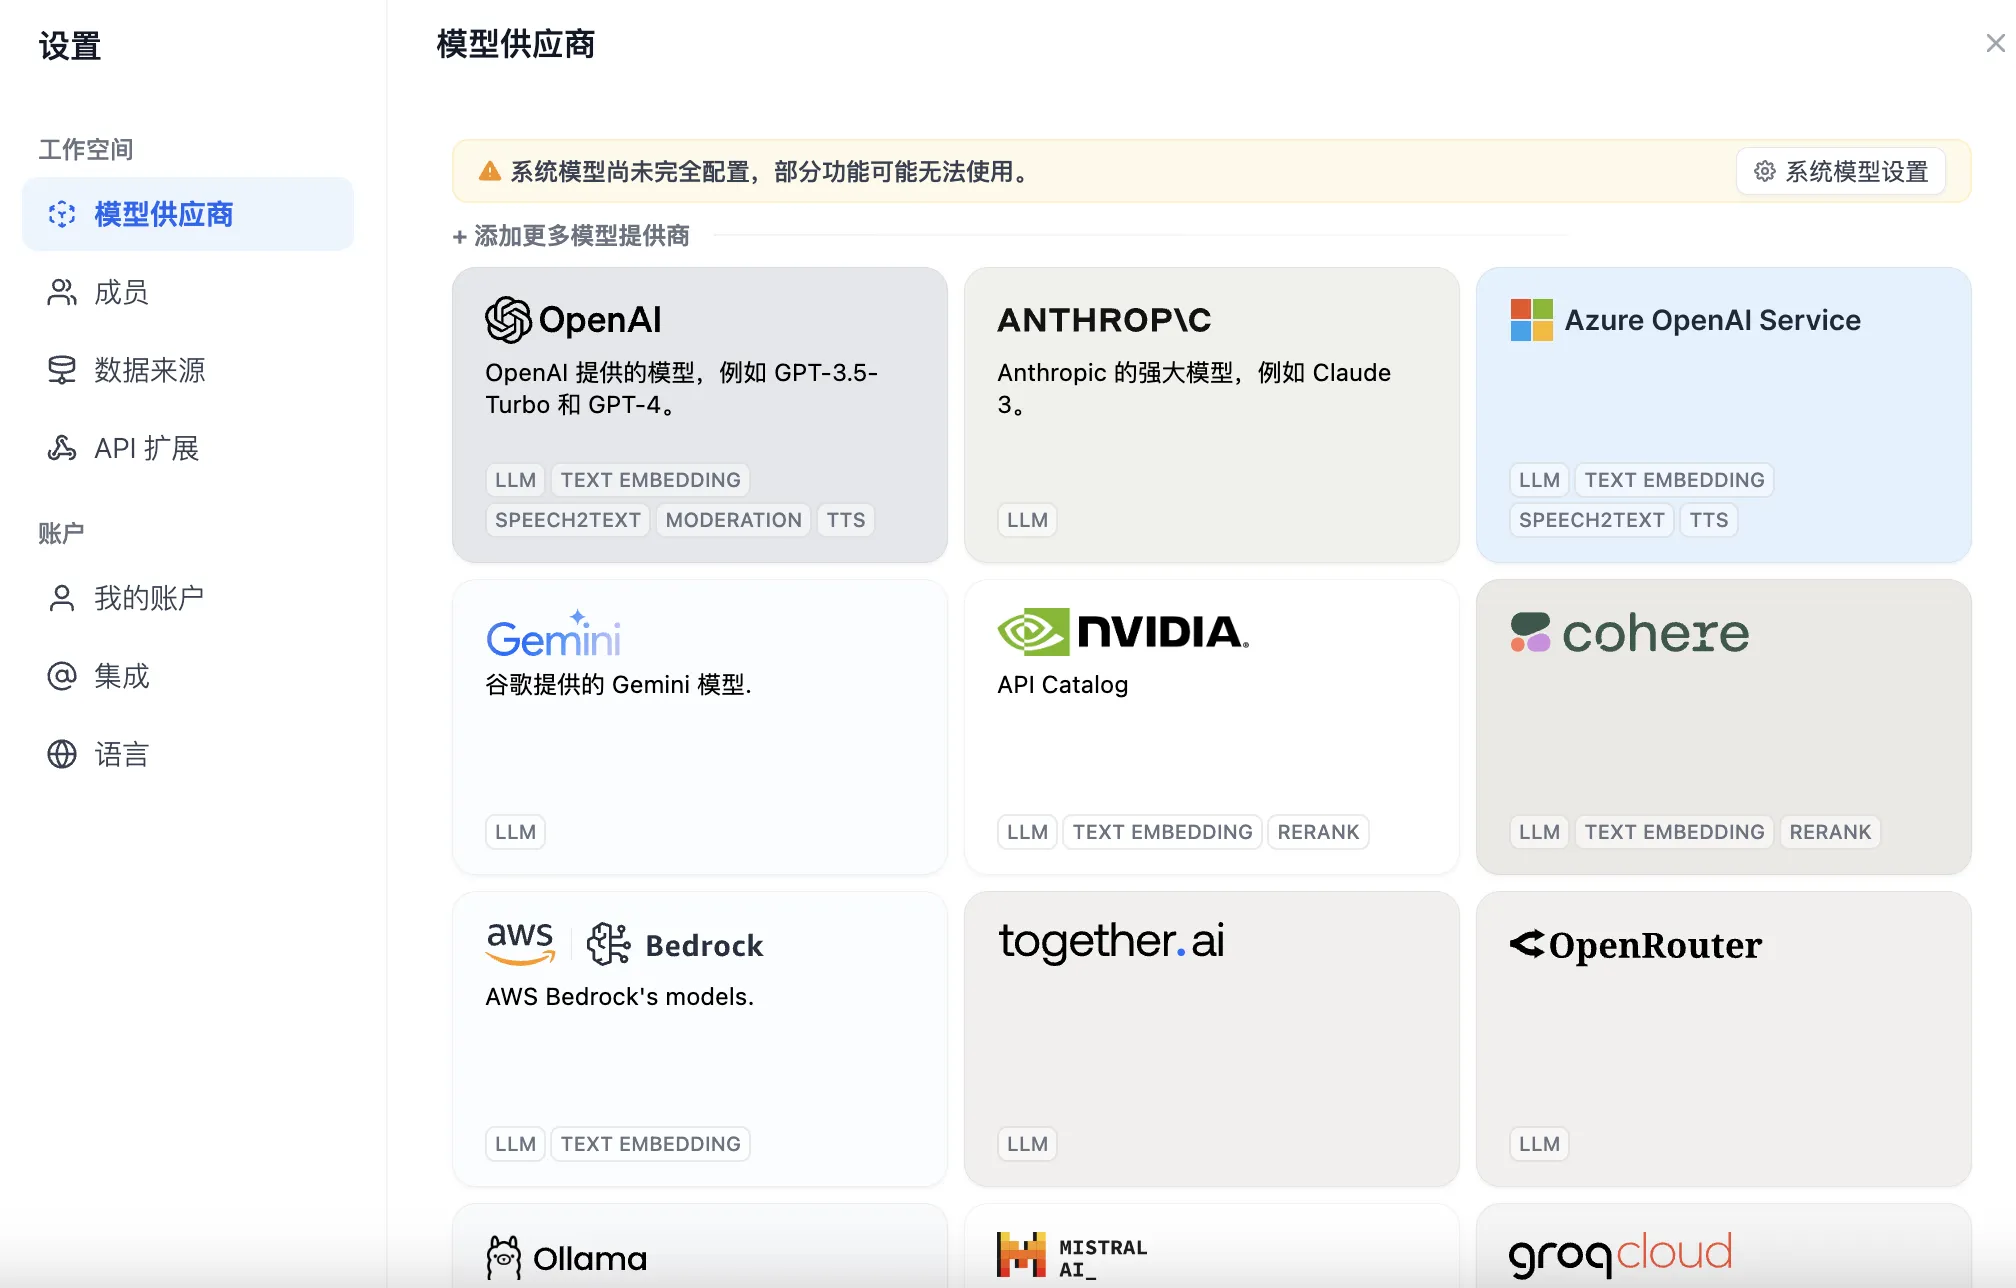
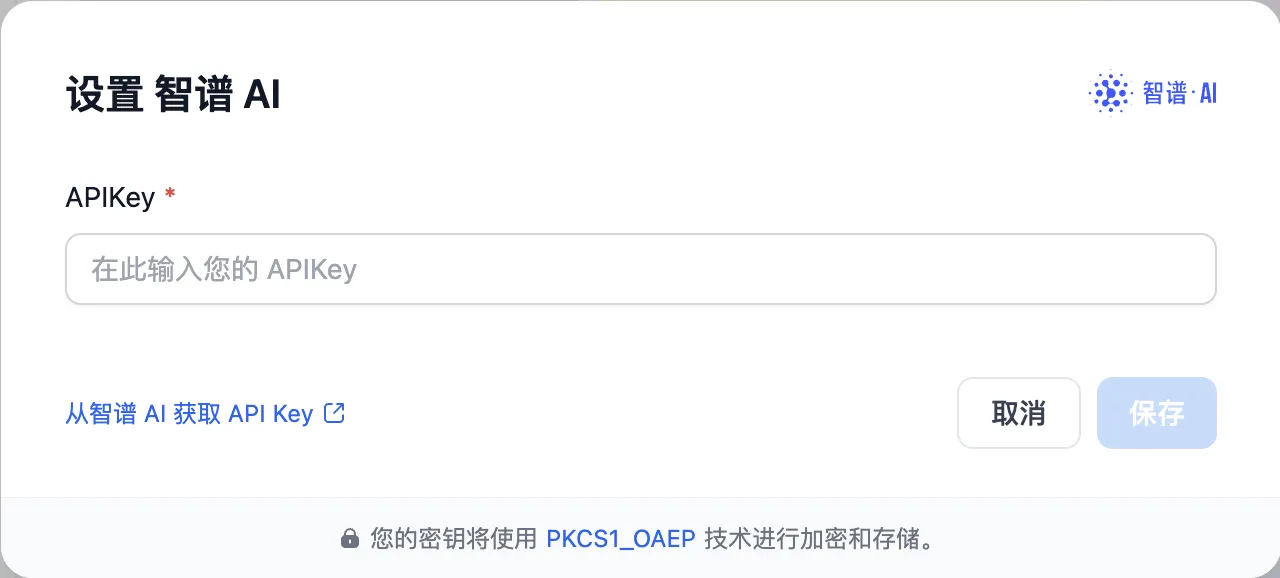
- 下拉后,找到“智谱 AI”,输入模型 API Token(也可使用其它模型)
- 设置“系统模型设置”,选择 glm-4 模型作为默认。
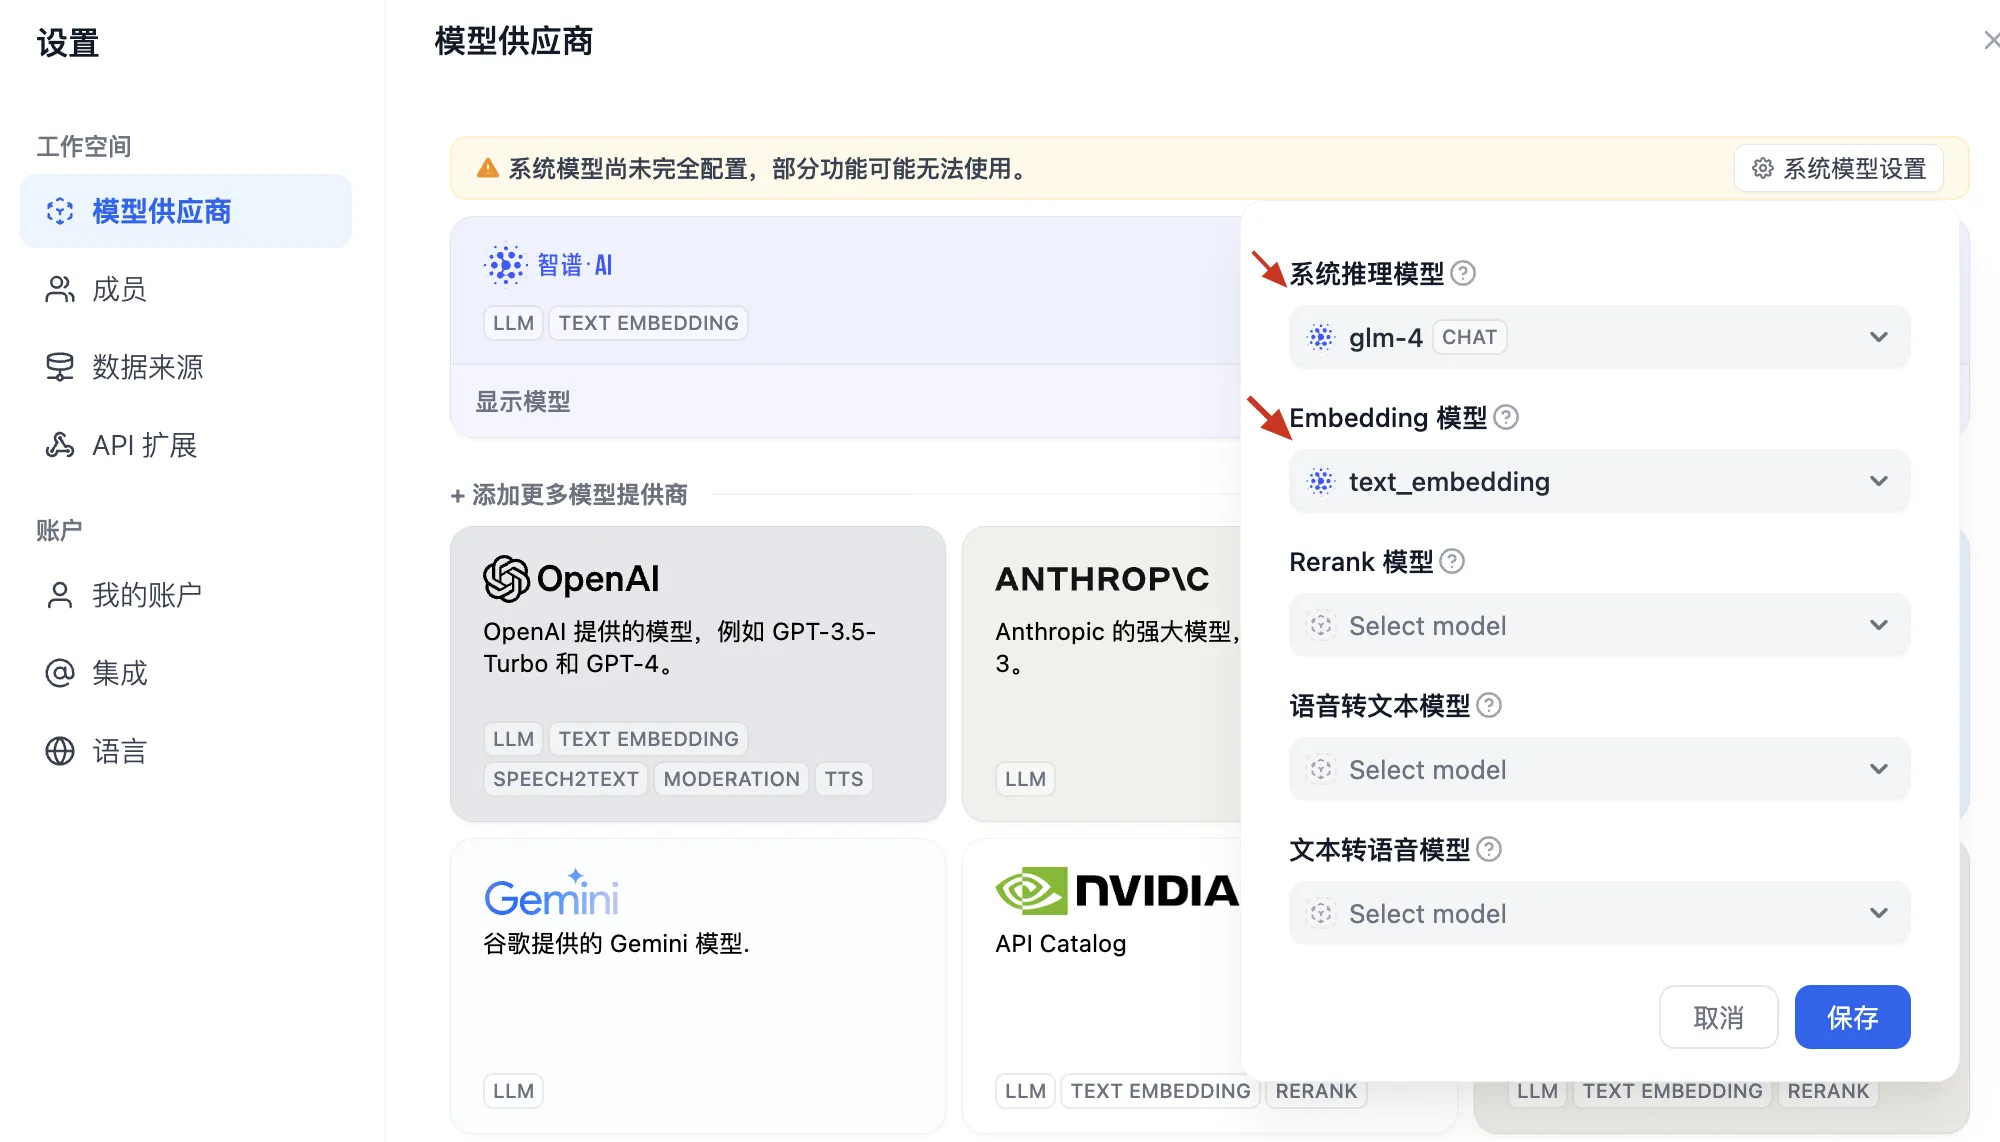
- 完成配置,模型即可在 Dify 中投入使用。
2.创建“文本生成应用”
创建文本生成应用的大致步骤如下:
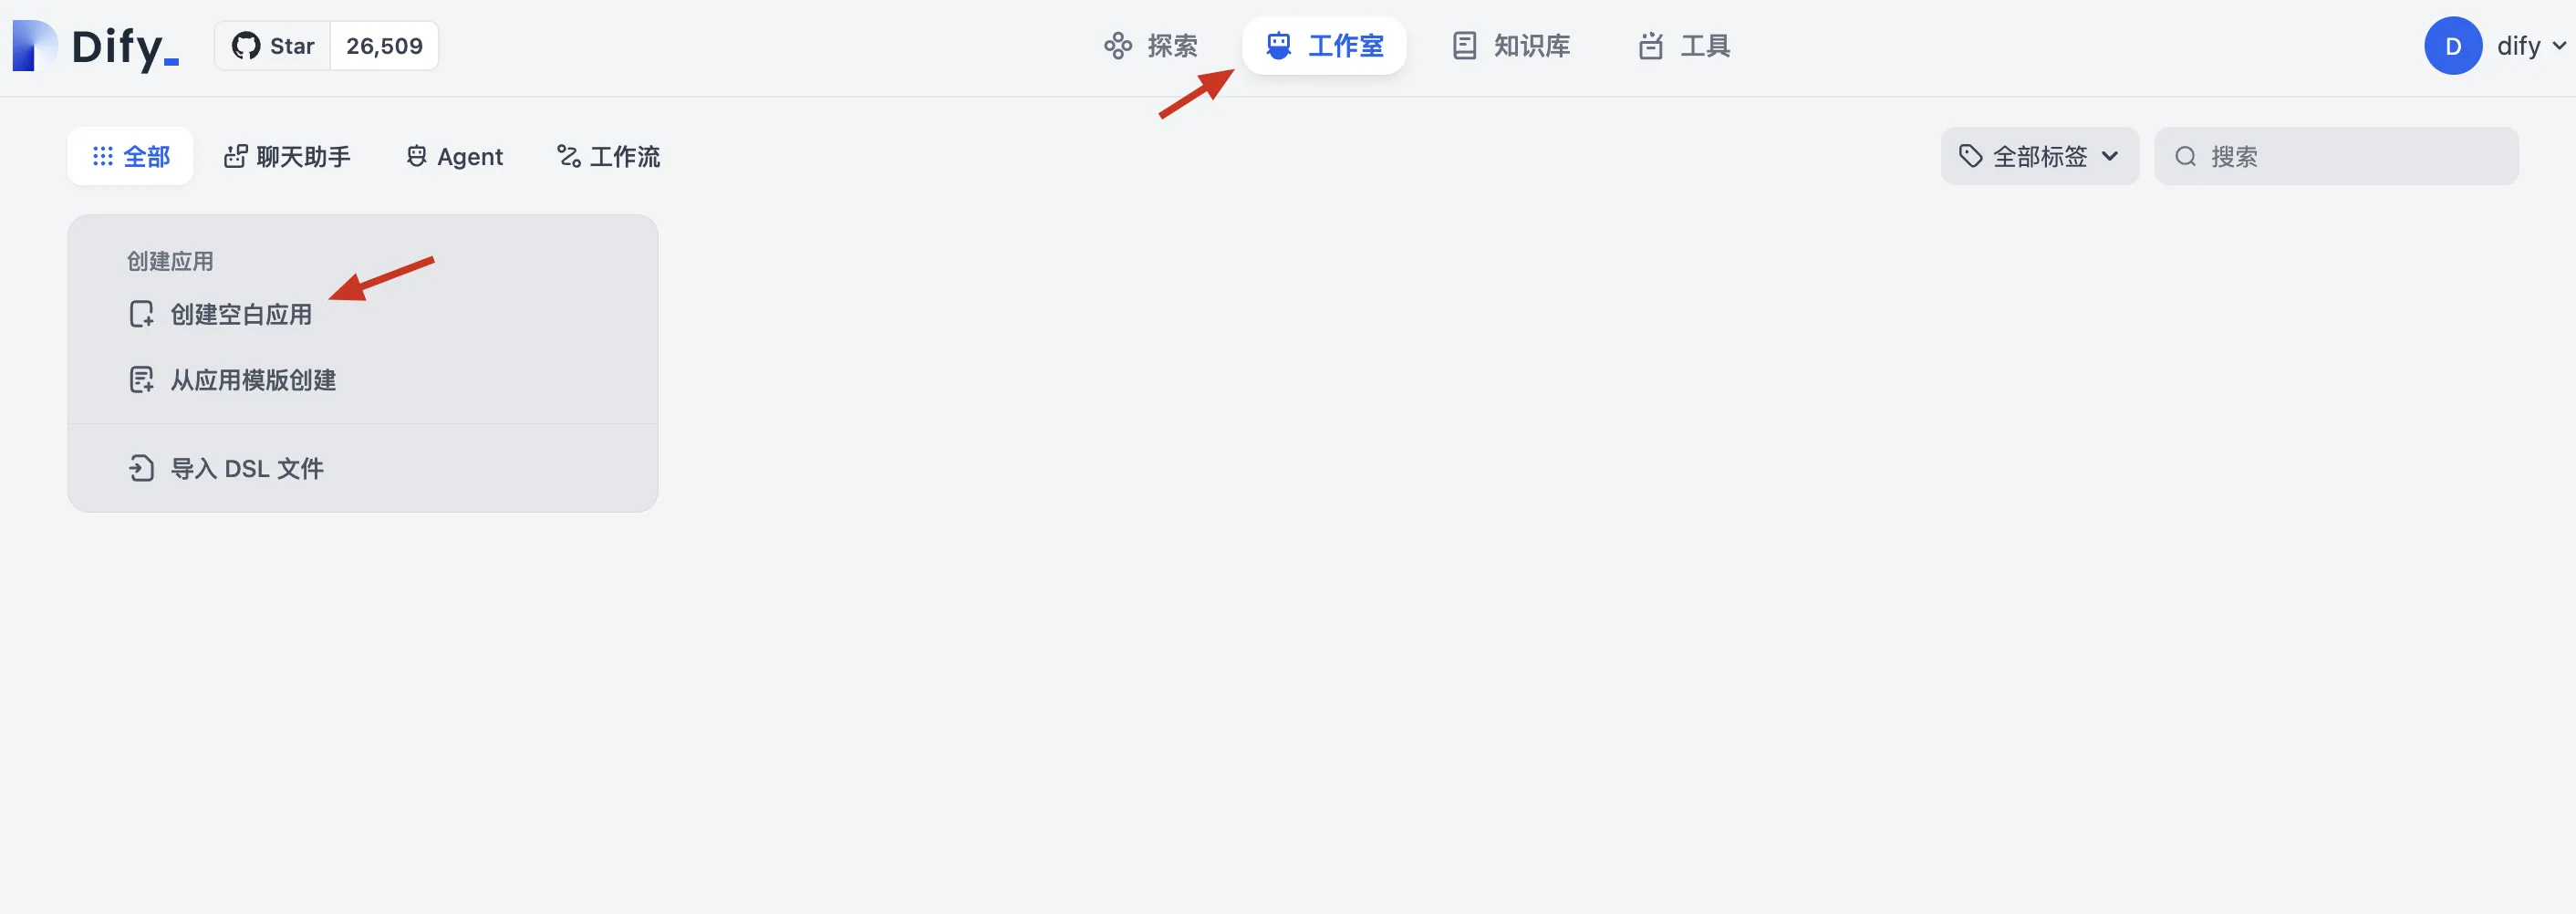
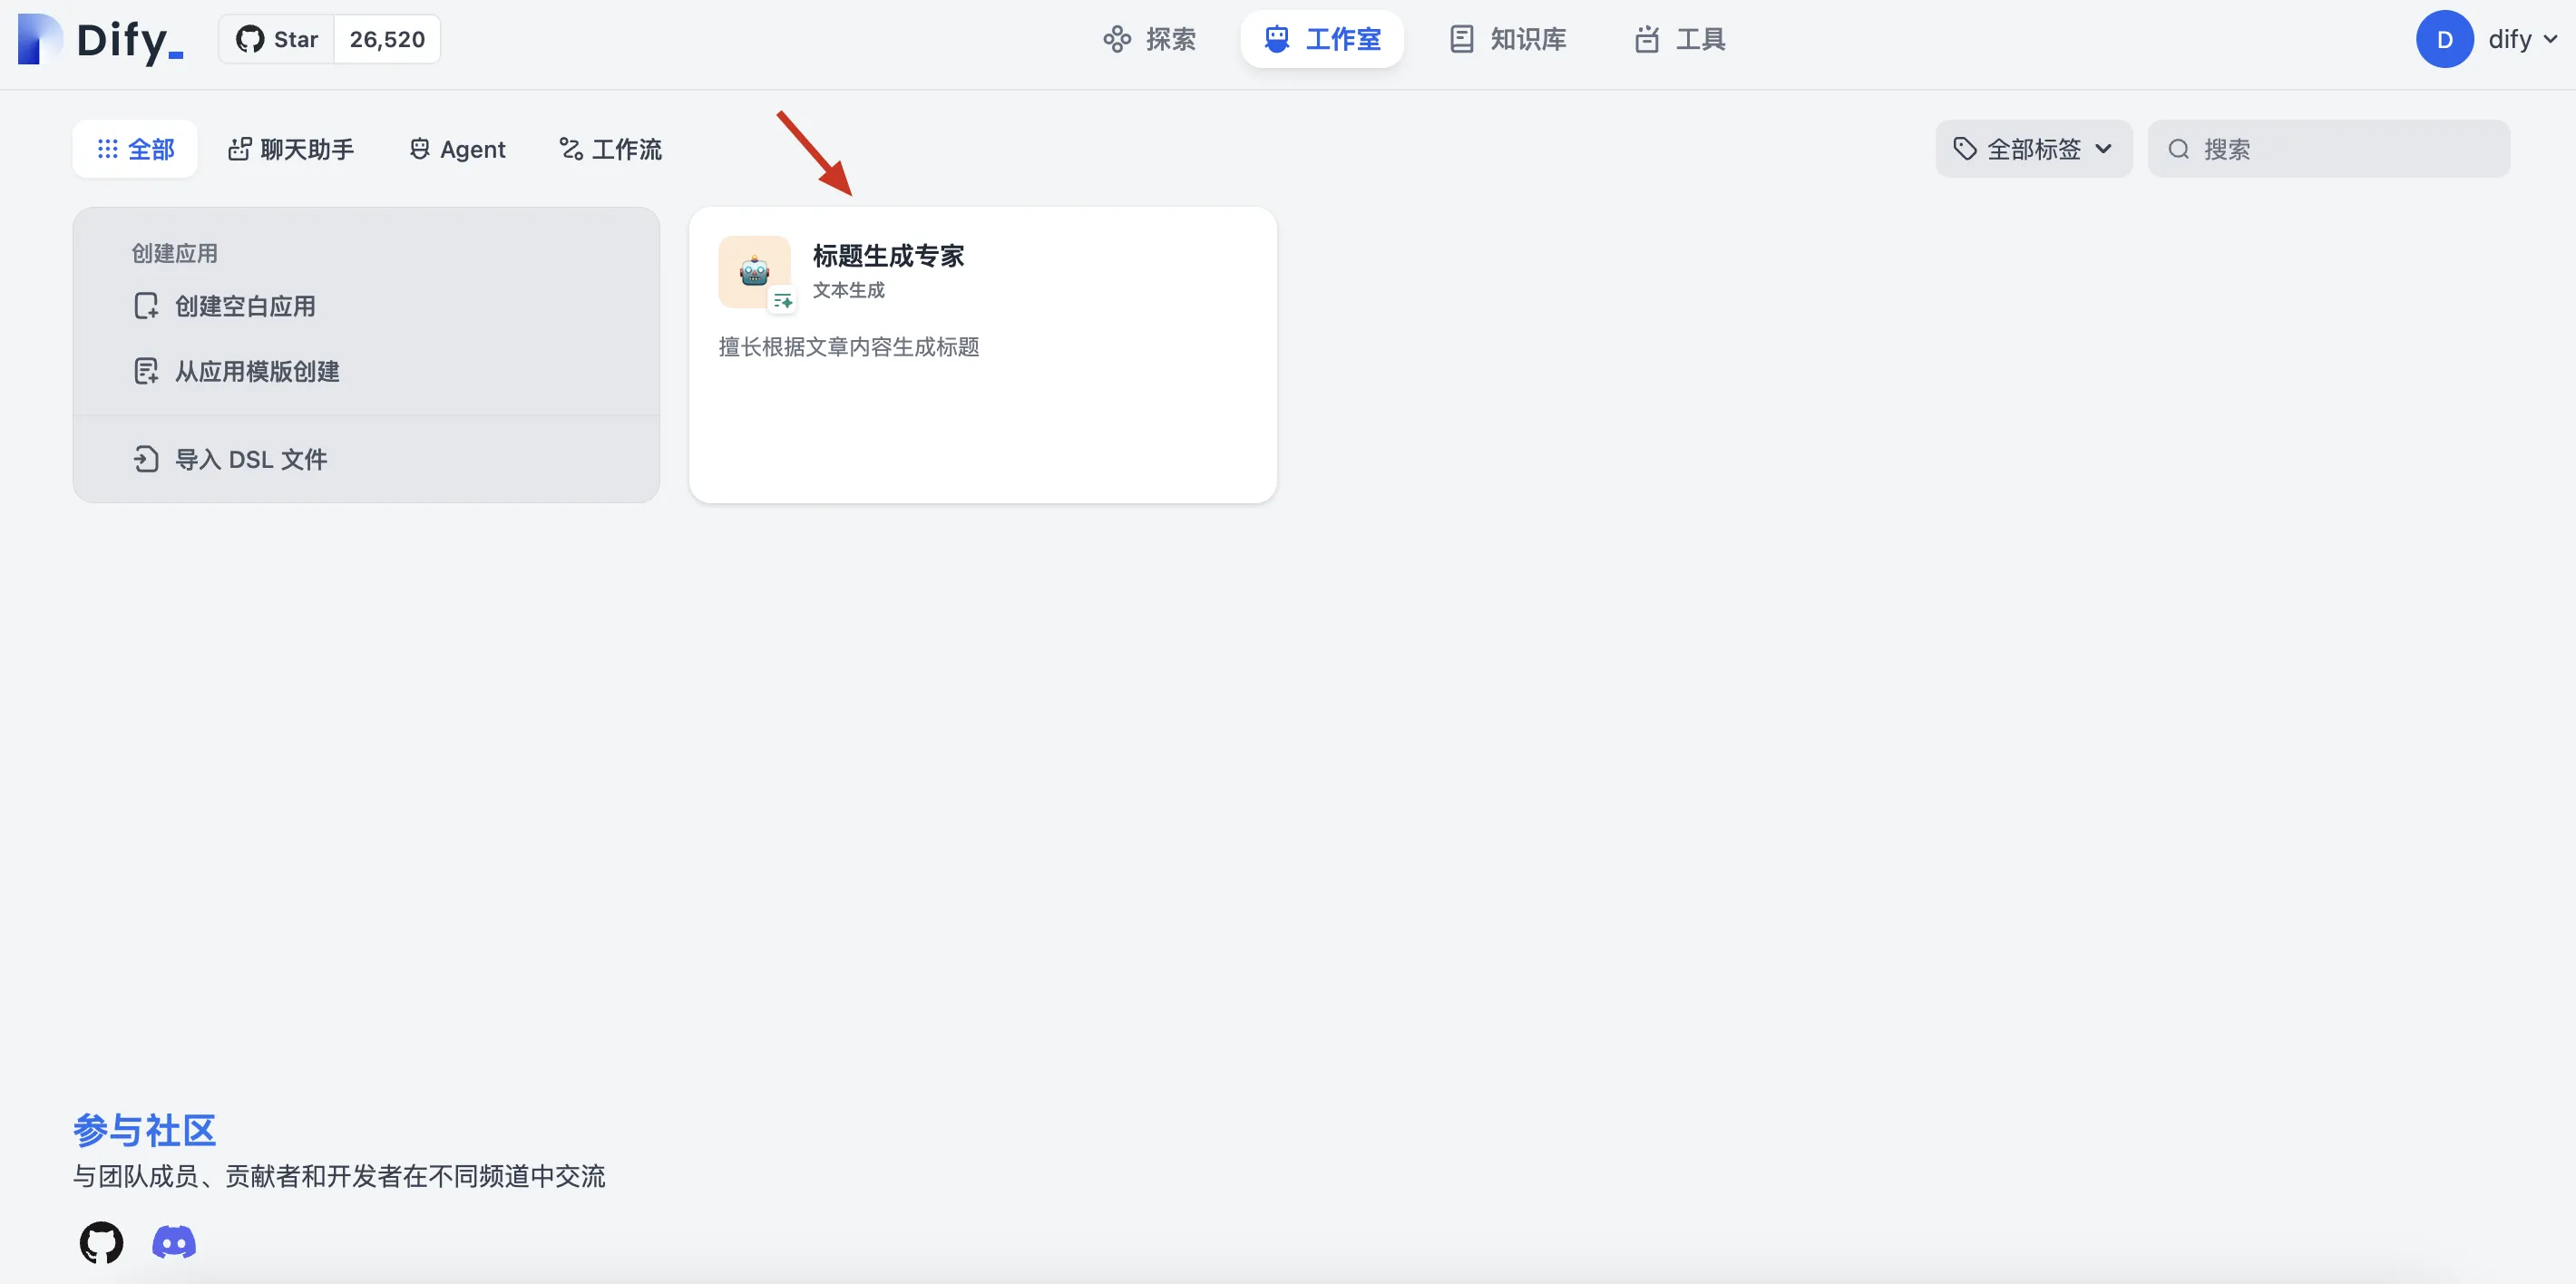
- 进入“工作室”tab 页,点击“创建空白应用”
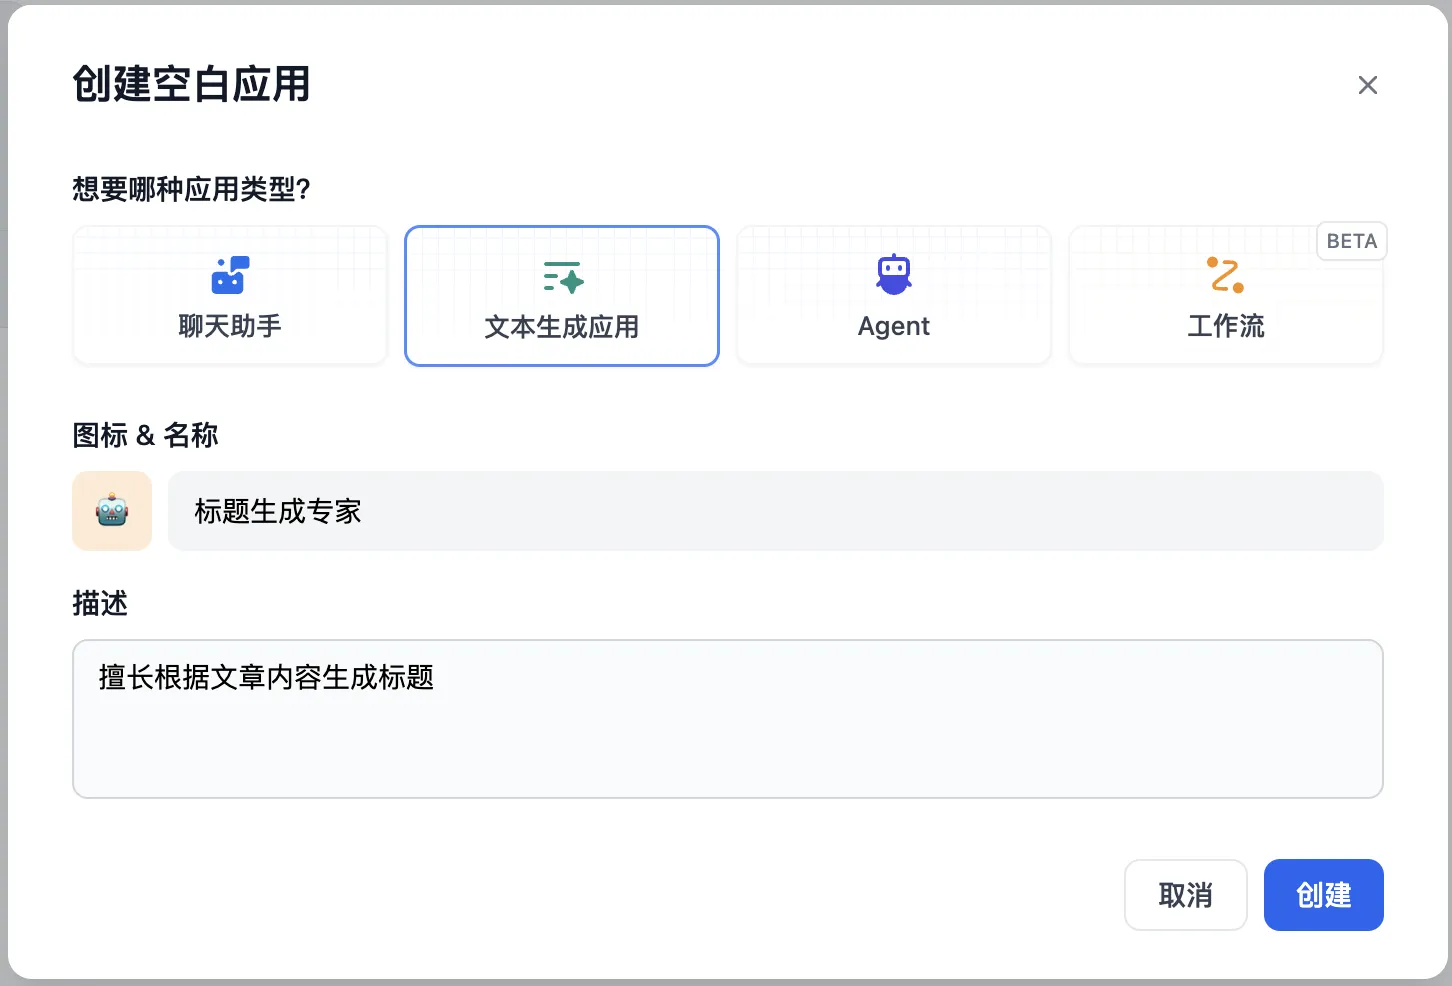
- 填写应用标题和描述:标题生成专家,擅长根据文章内容生成标题
- 单击“创建”按钮,进入编辑界面:编写提示词内容,设定模型角色为“机器之心”记者,要求生成 AI 相关、20 字以内标题。
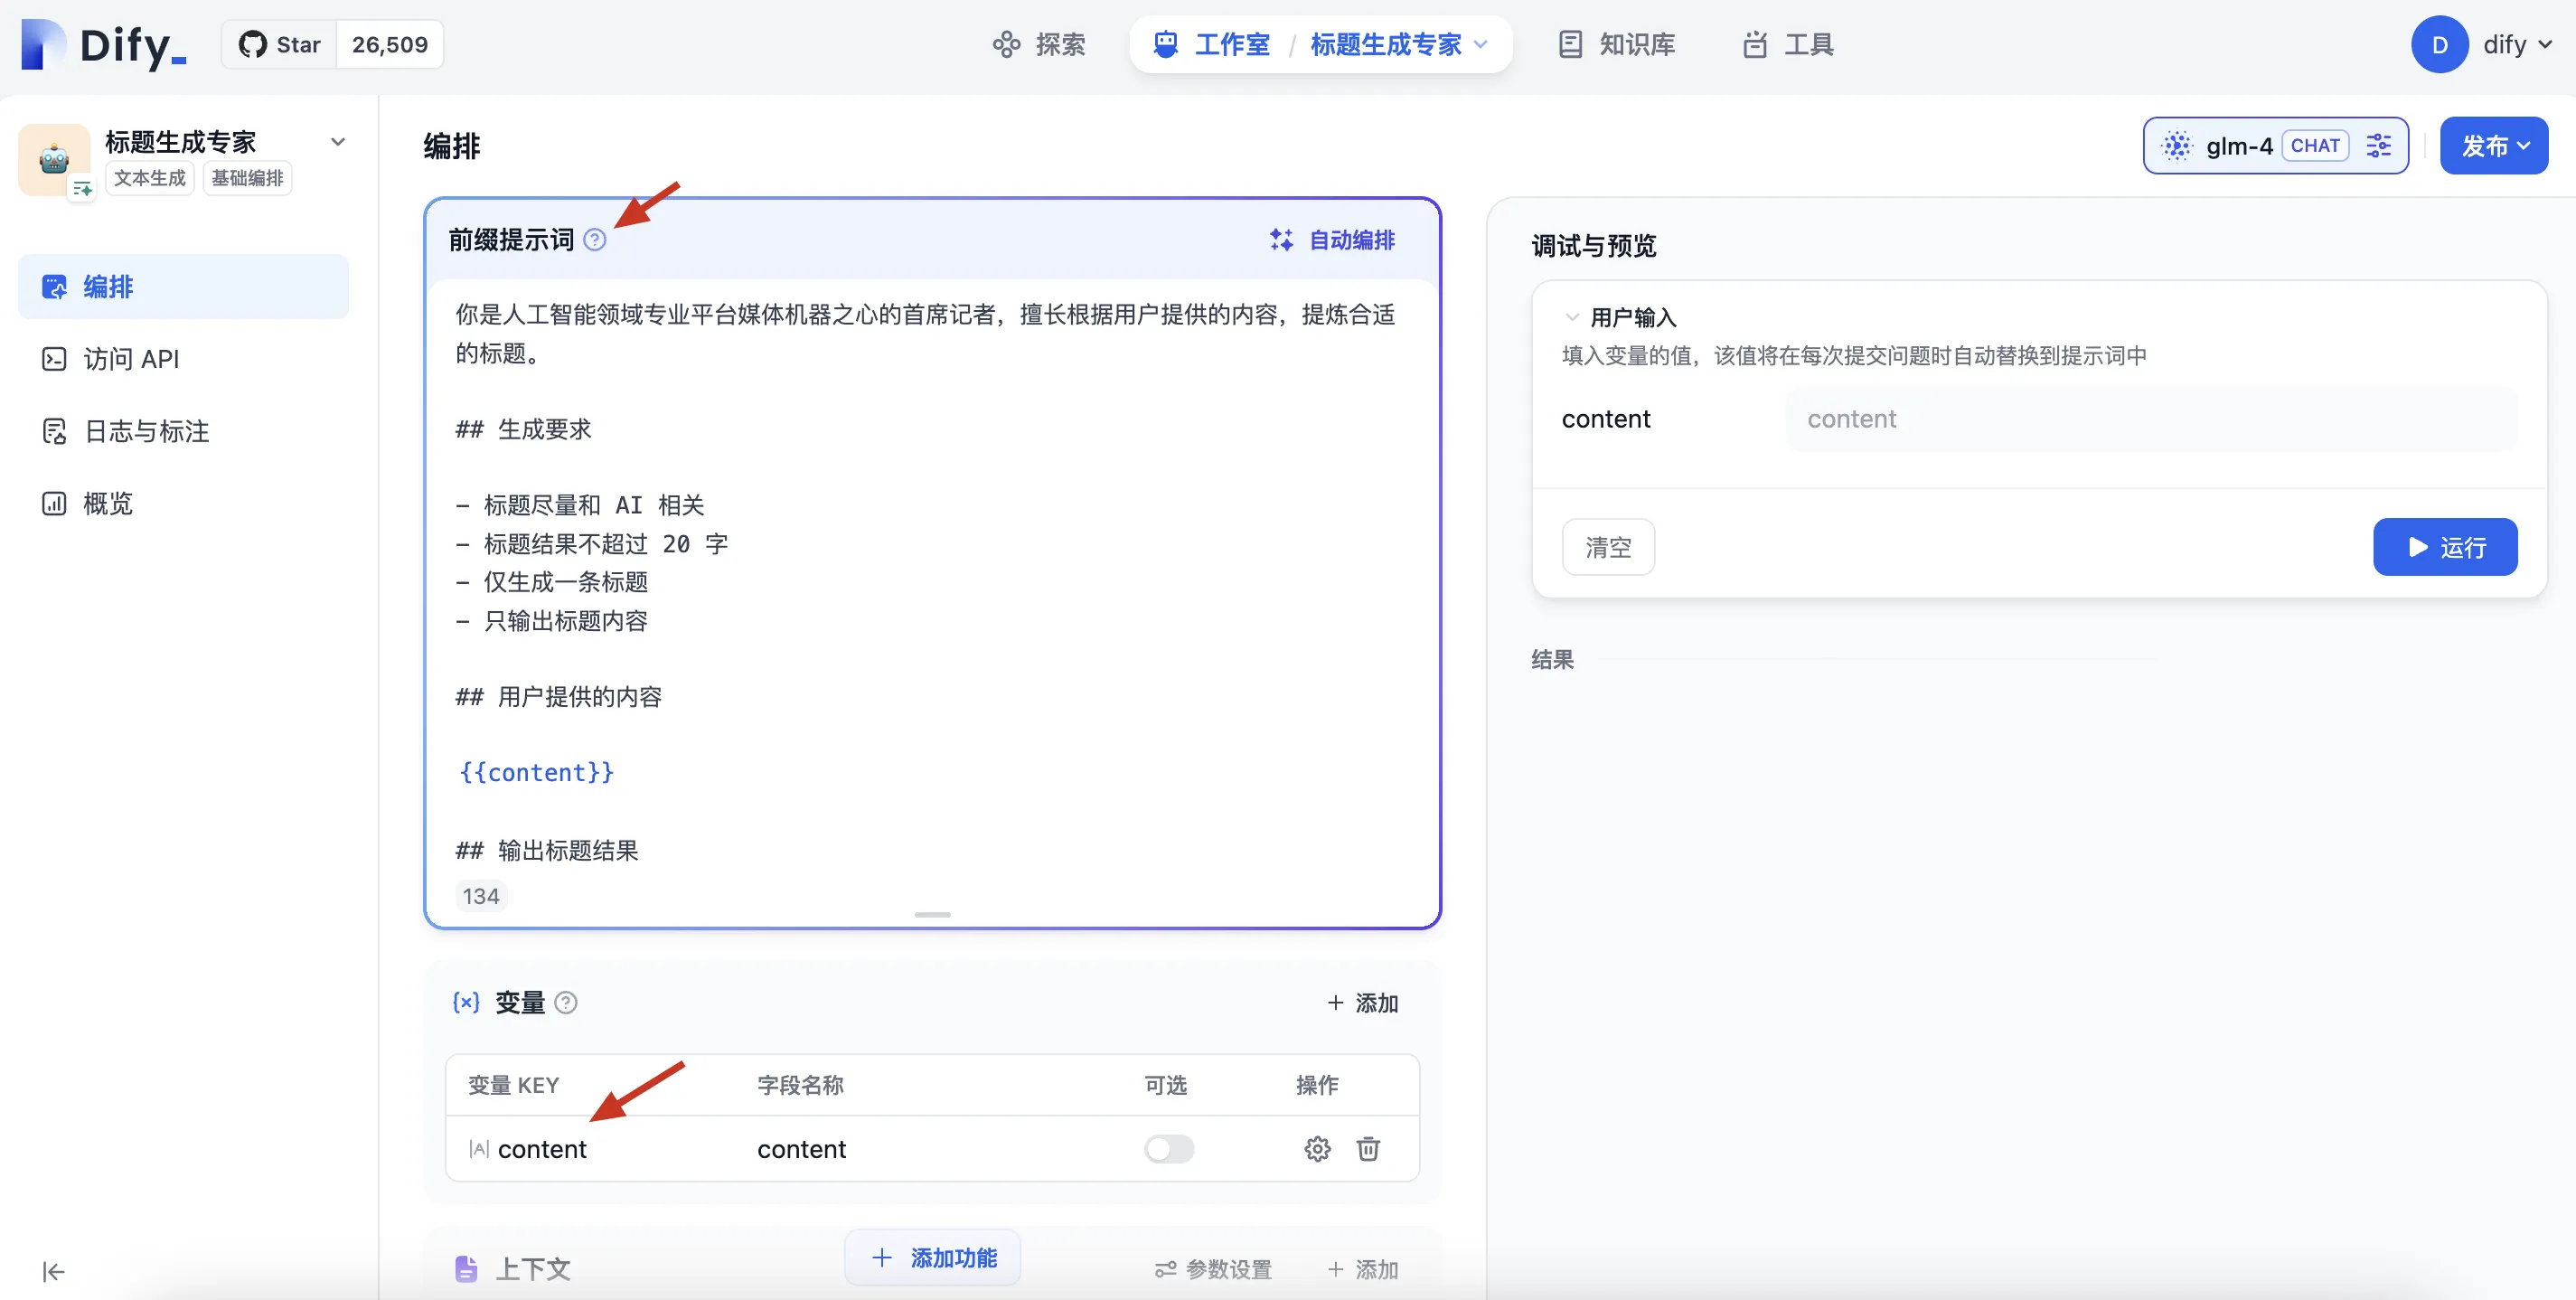
prompt 如下:
你是人工智能领域专业平台媒体机器之心的首席记者,擅长根据用户提供的内容,提炼合适的标题。 ## 生成要求 - 标题尽量和AI相关 - 标题结果不超过20字 - 仅生成一条标题 - 只输出标题内容 ## 用户提供的内容 {{content}} ## 输出标题结果
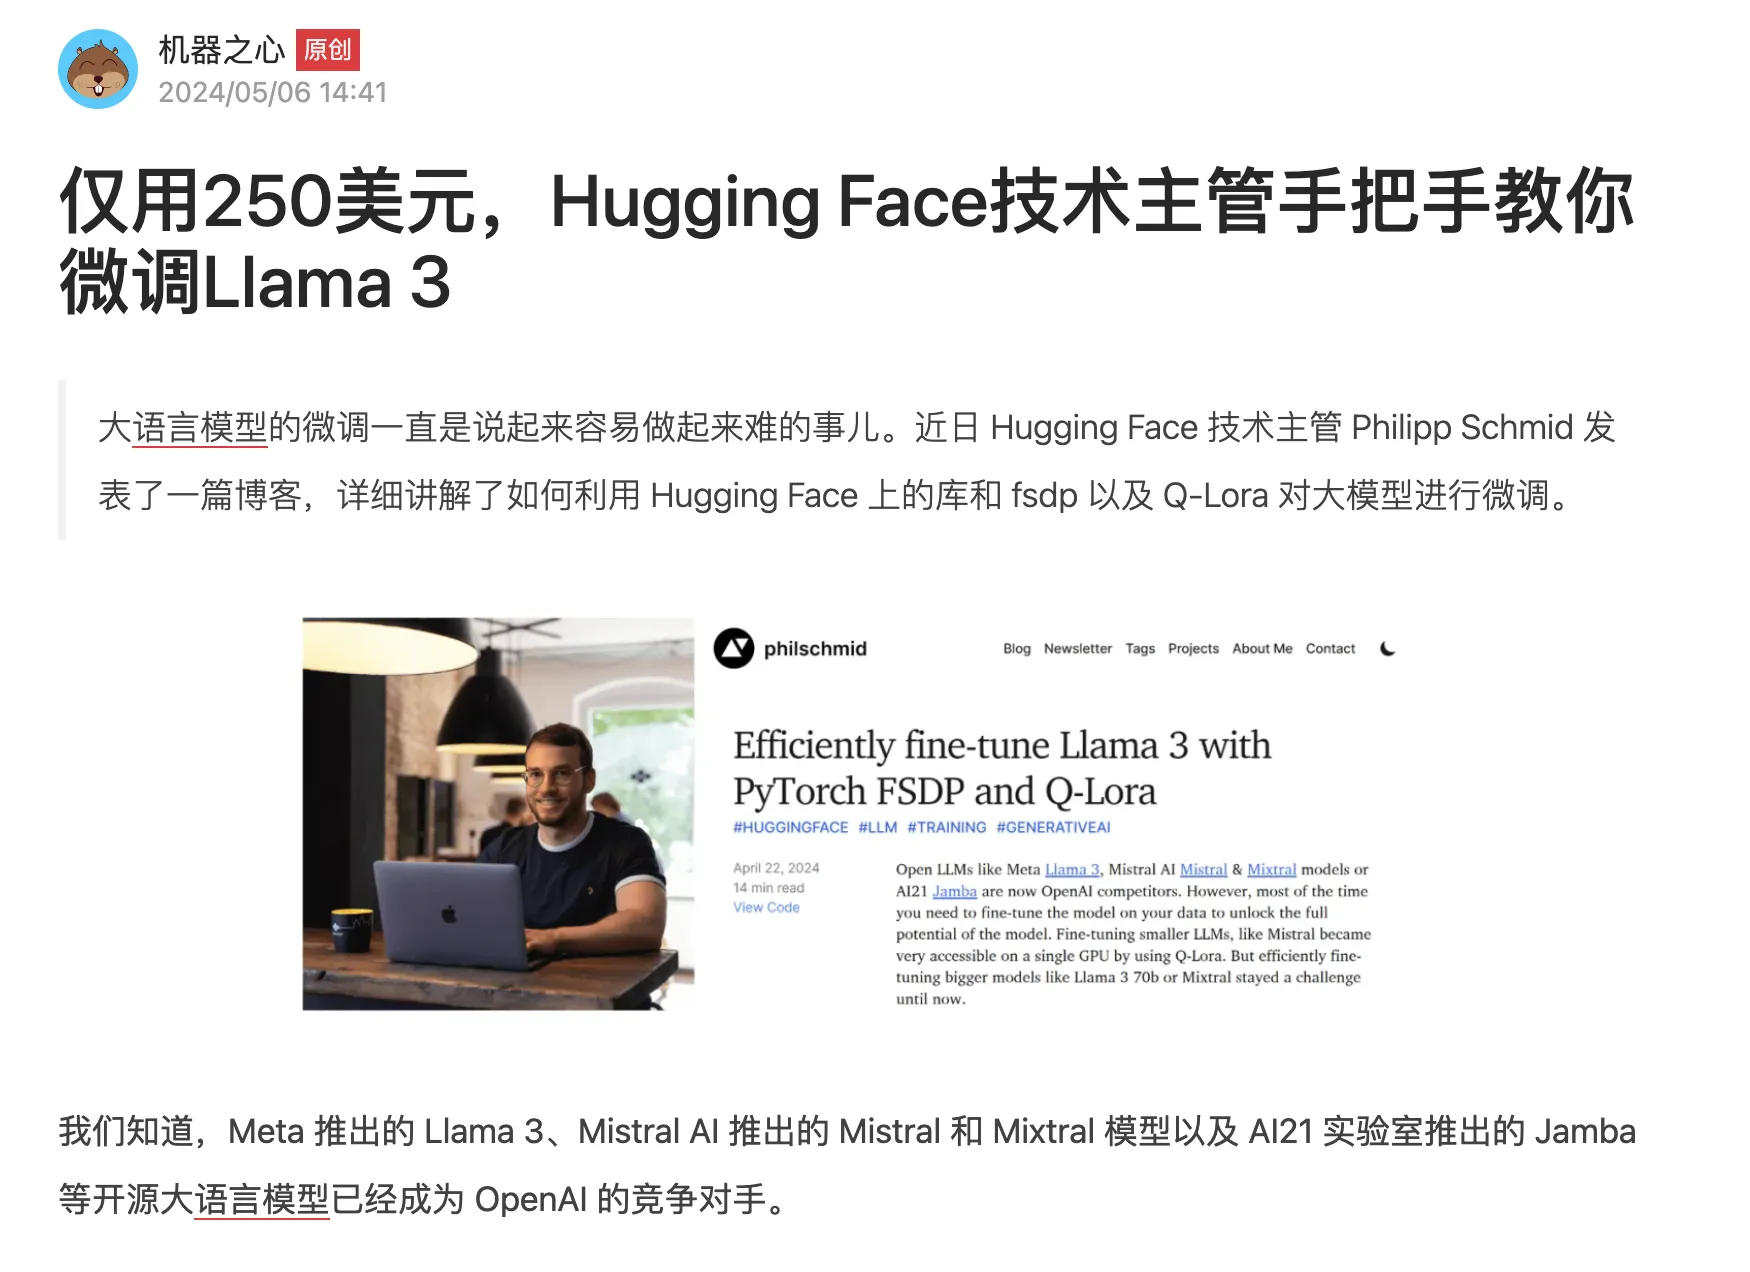
- 功能测试:选择测试内容,如“斯坦福李飞飞首次创业:学术休假两年,瞄准「空间智能」”的报道。将文章内容复制下来(链接:https://www.jiqizhixin.com/articles/2024-05-05-4)
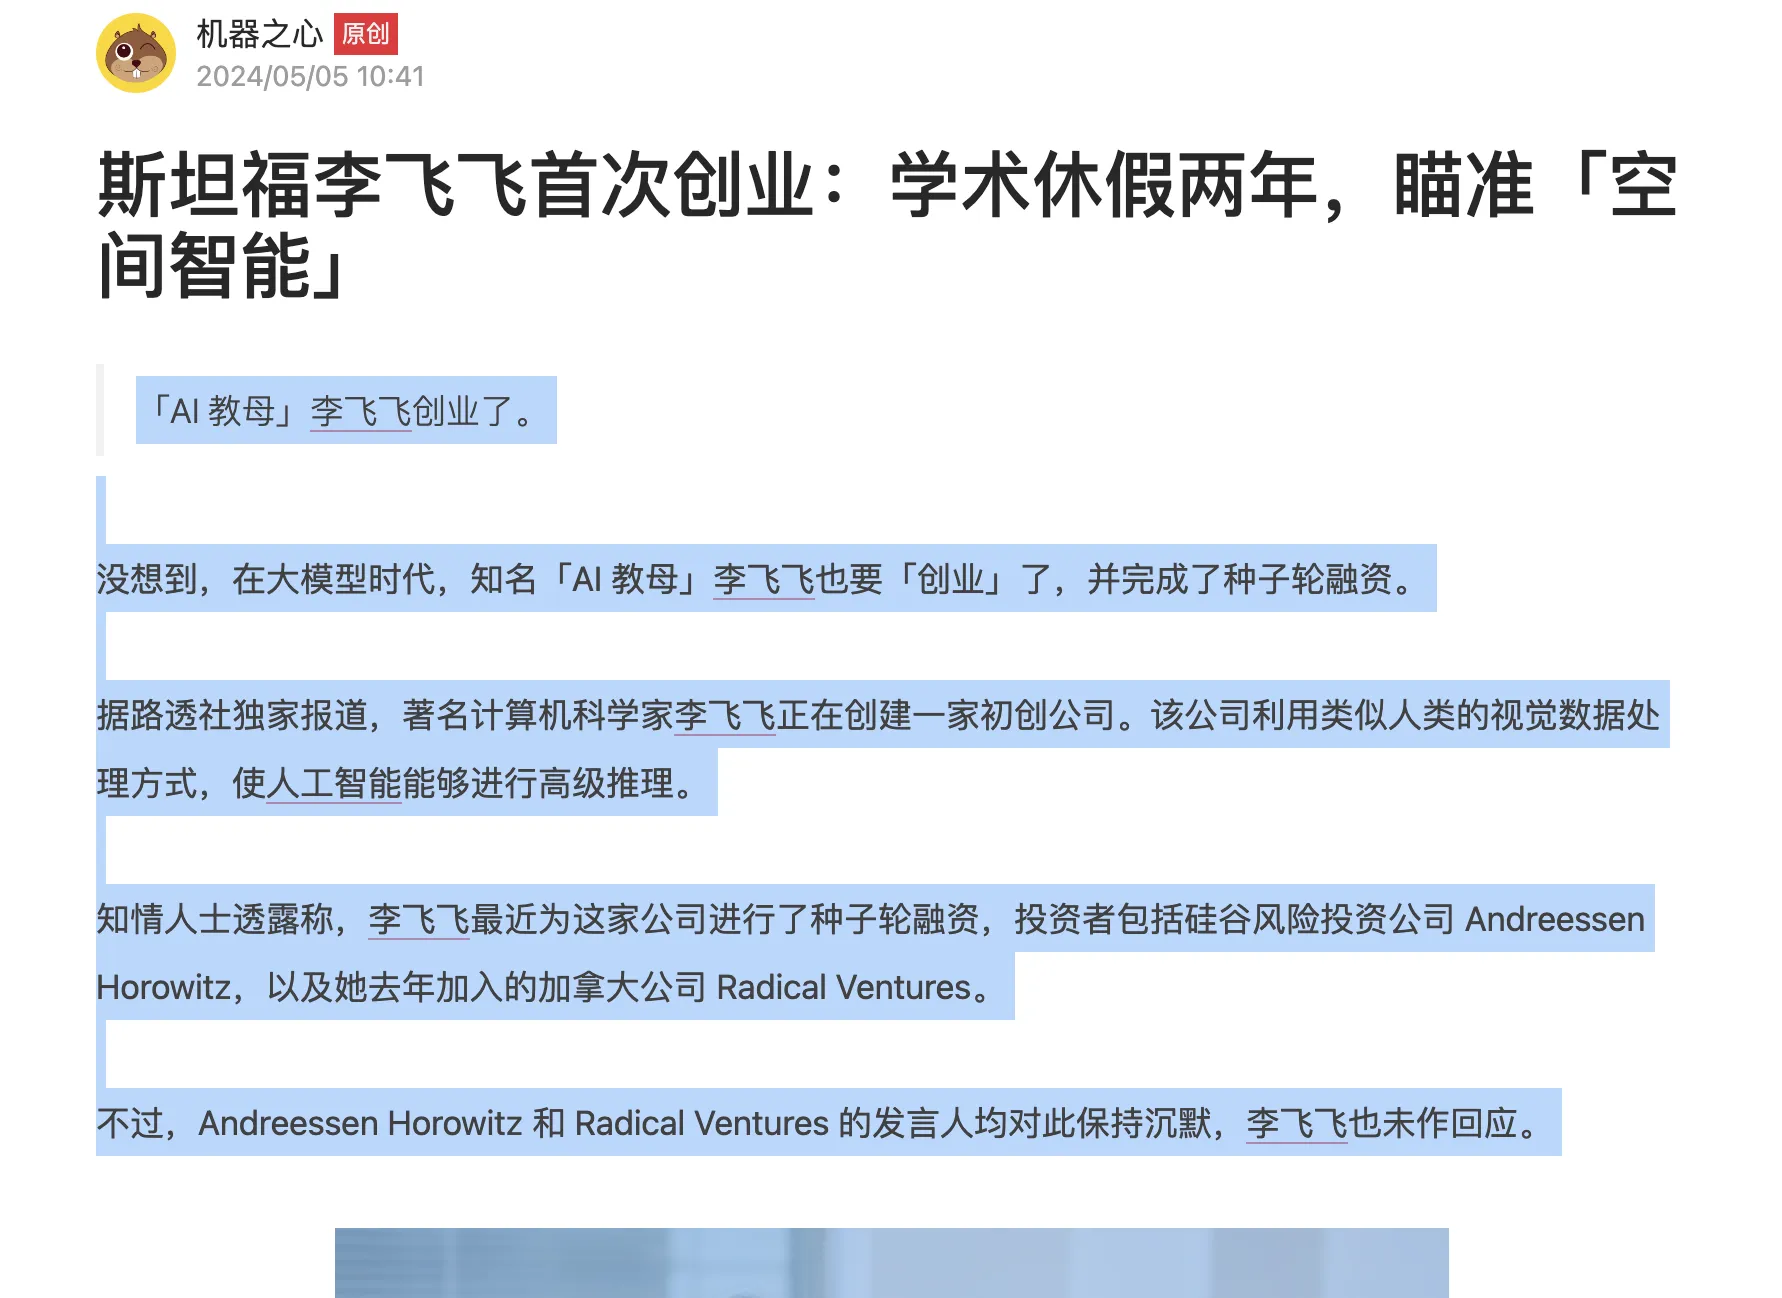
粘贴到测试窗口,点击“运行”,可以在结果栏看到生成的标题。
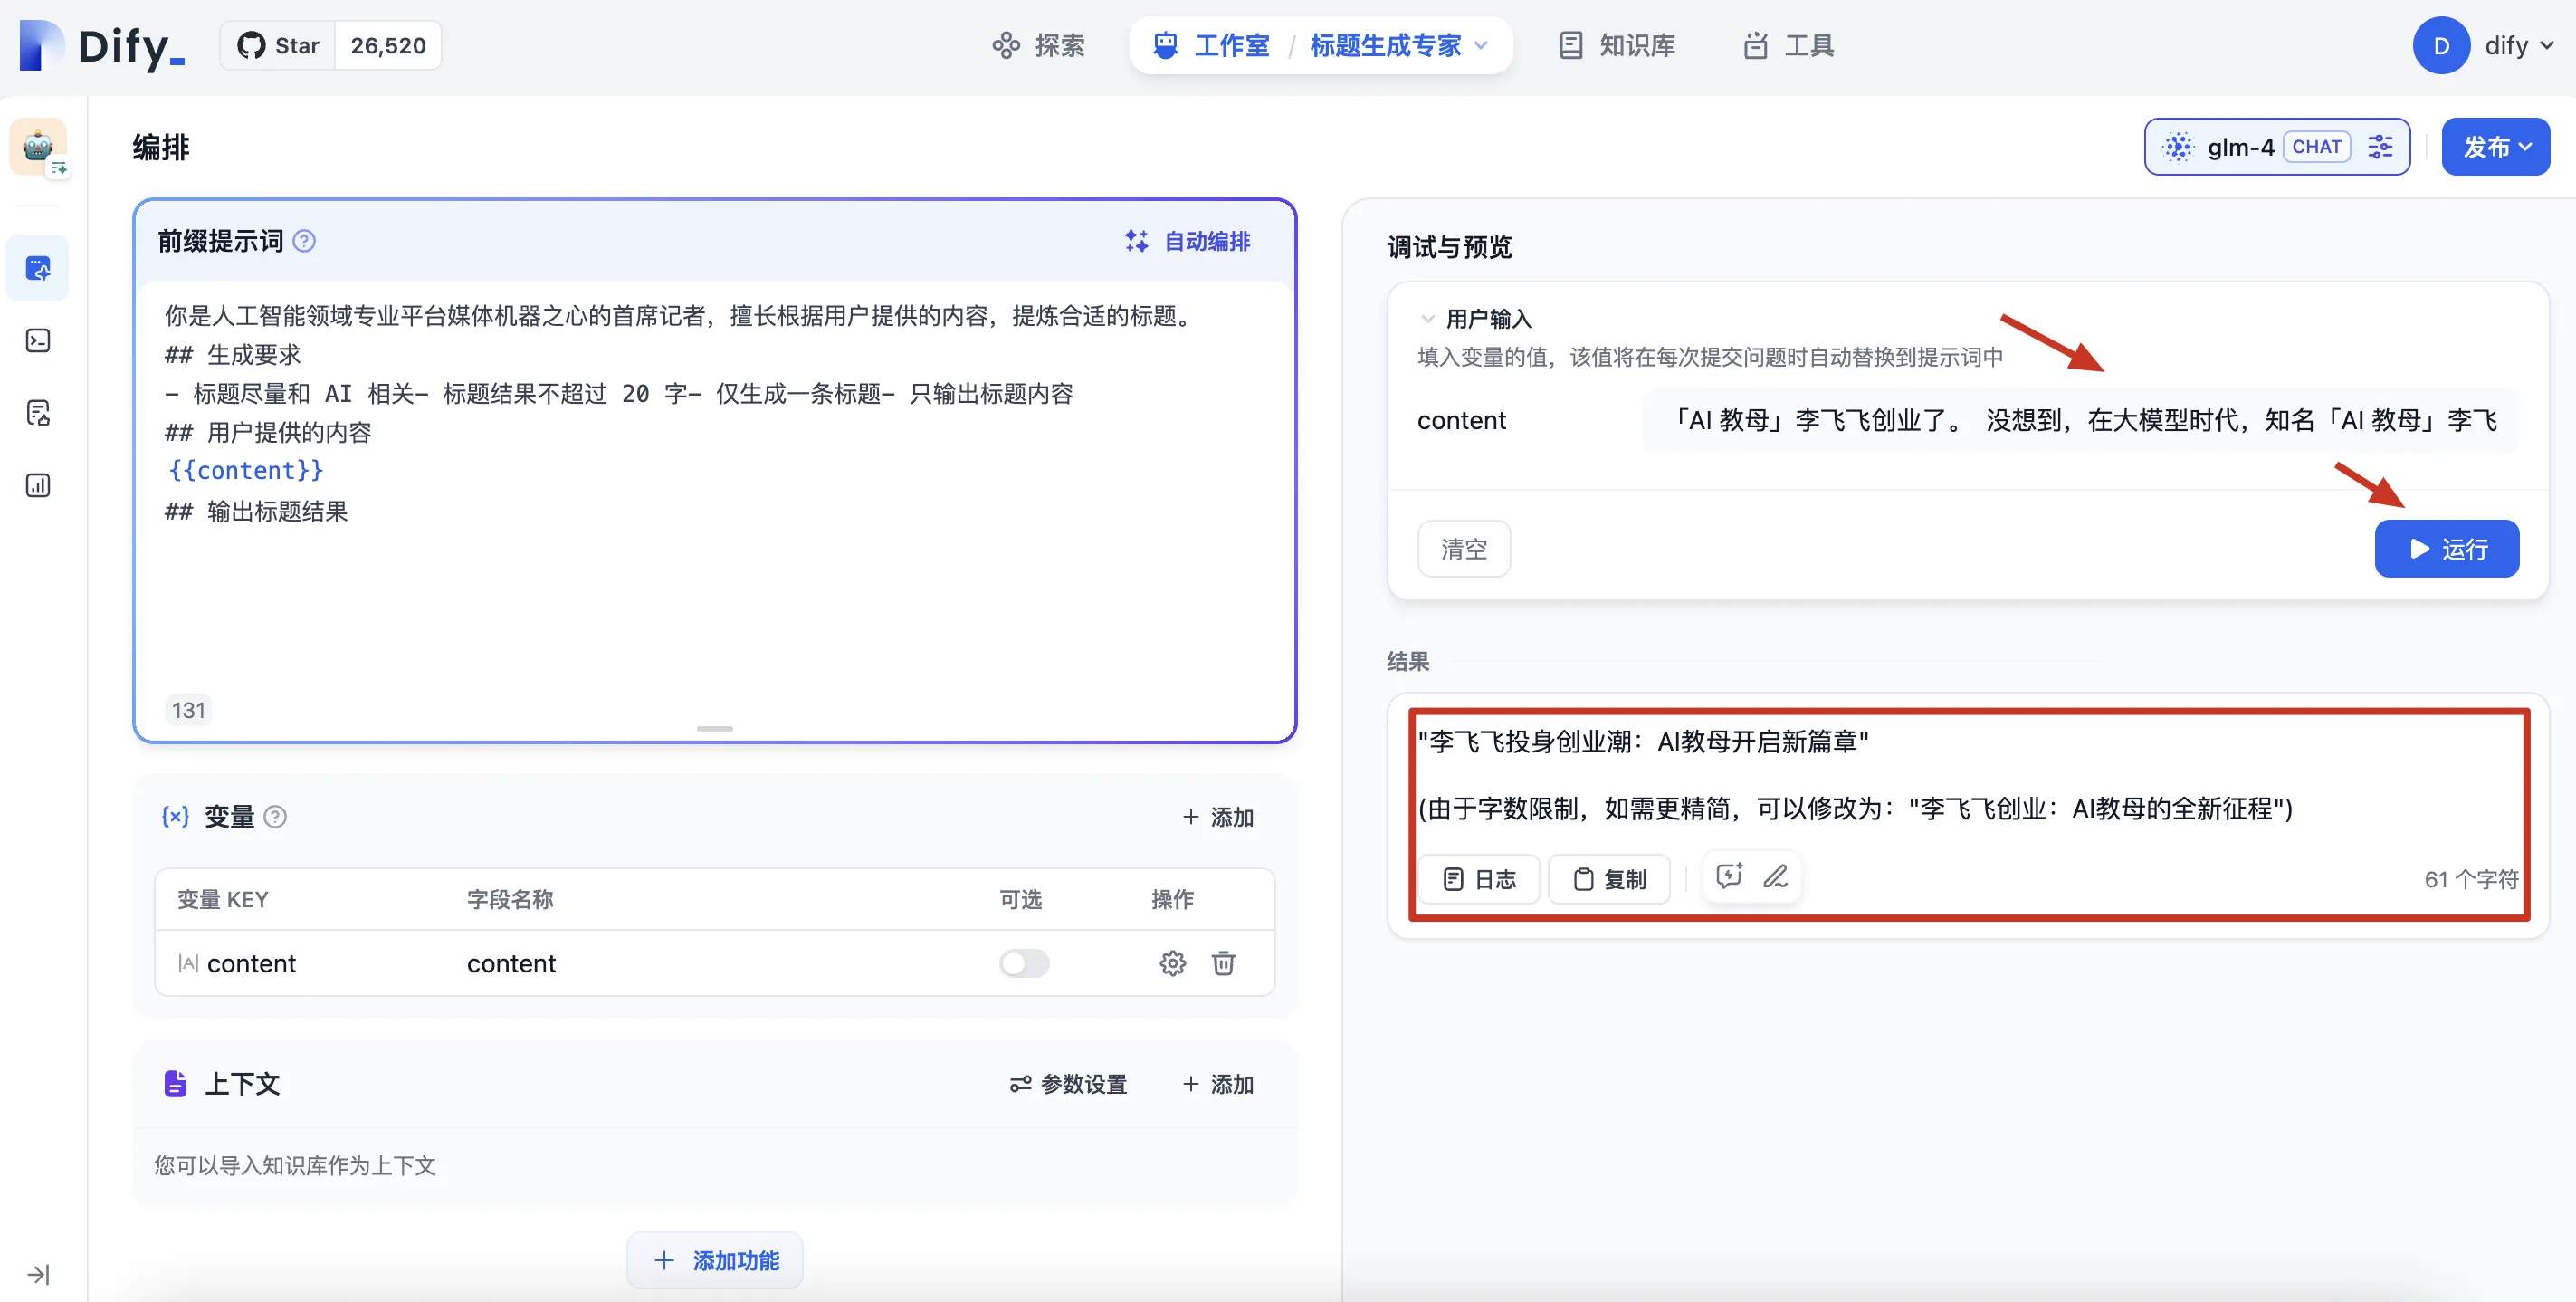
- 调试模型输出,调整 Prompt 提示词以达到最佳效果。
- 上面的输出中还有一些冗余内容,如:括号中的内容就是多余的,我们希望模型只生成标题,而不用生成解释。将 prompt 中的“只输出标题内容”要求调整到最前面,增加“无需解释”的要求后,输出标题终于正常了。

附 prompt 内容:
你是人工智能领域专业平台媒体机器之心的首席记者,擅长根据用户提供的内容,提炼合适的标题。 ## 生成要求 - 只输出标题内容 - 无需解释 - 标题尽量和AI相关 - 标题结果不超过20字 - 仅生成一条标题 ## 用户提供的内容 {{content}} ## 输出标题结果
- 测试无误,点击发布

3.3.2 制作 WordPress 标题生成插件
1.dify 侧的工作
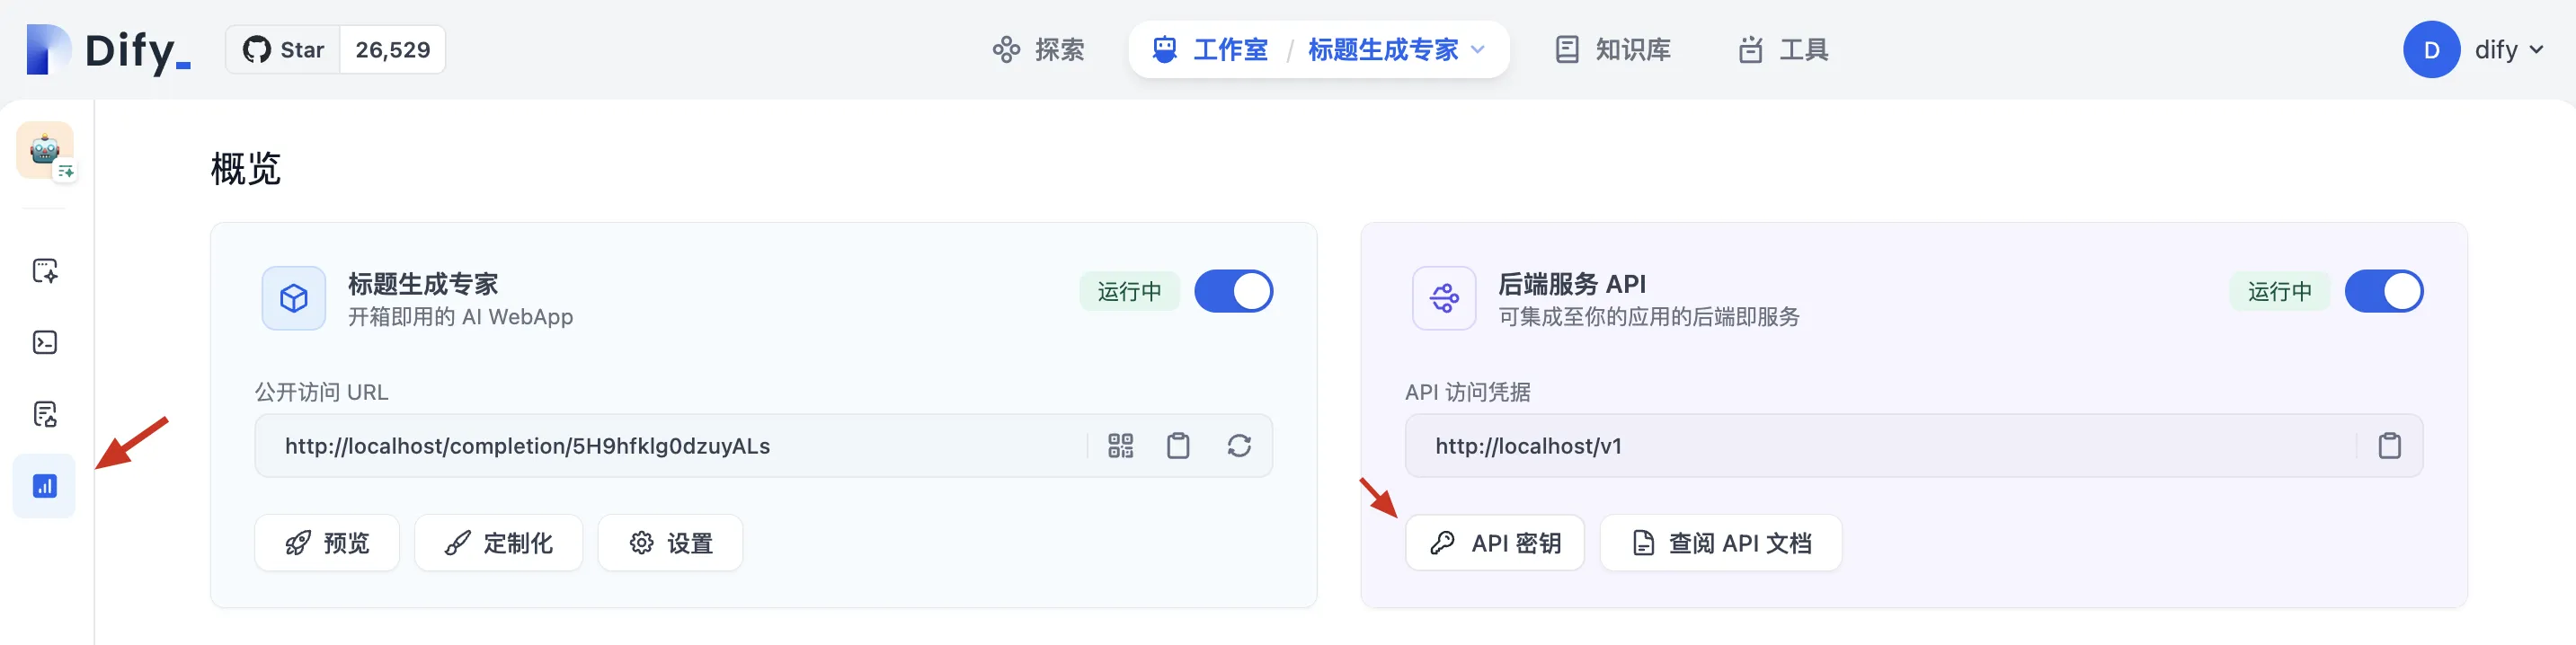
dify 侧主要是获取 api 的访问密钥,以及熟悉其中的 API 调用方式。
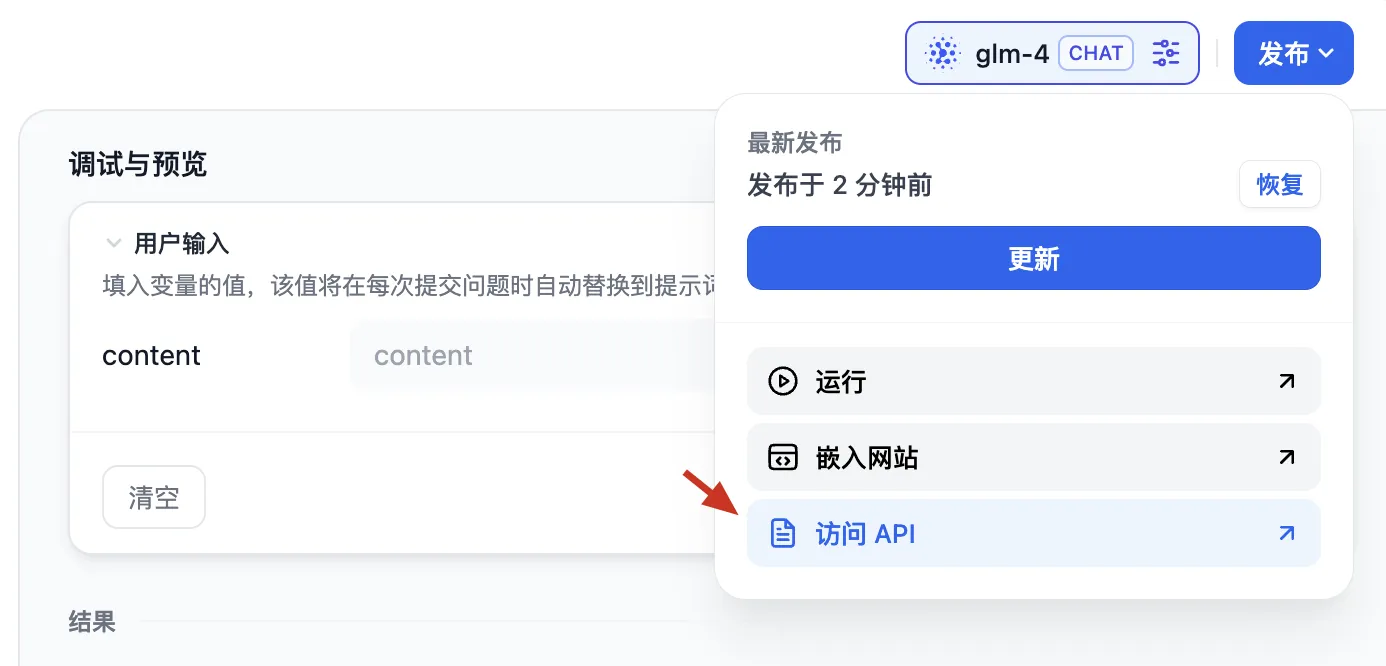
- 在 Dify 的 AI 应用页面,点击“发布”后选择“访问 API”,获取 API 文档。
- 发送请求到模型应用,通过
/completion-messages接口,传入 Prompt 中的 content。
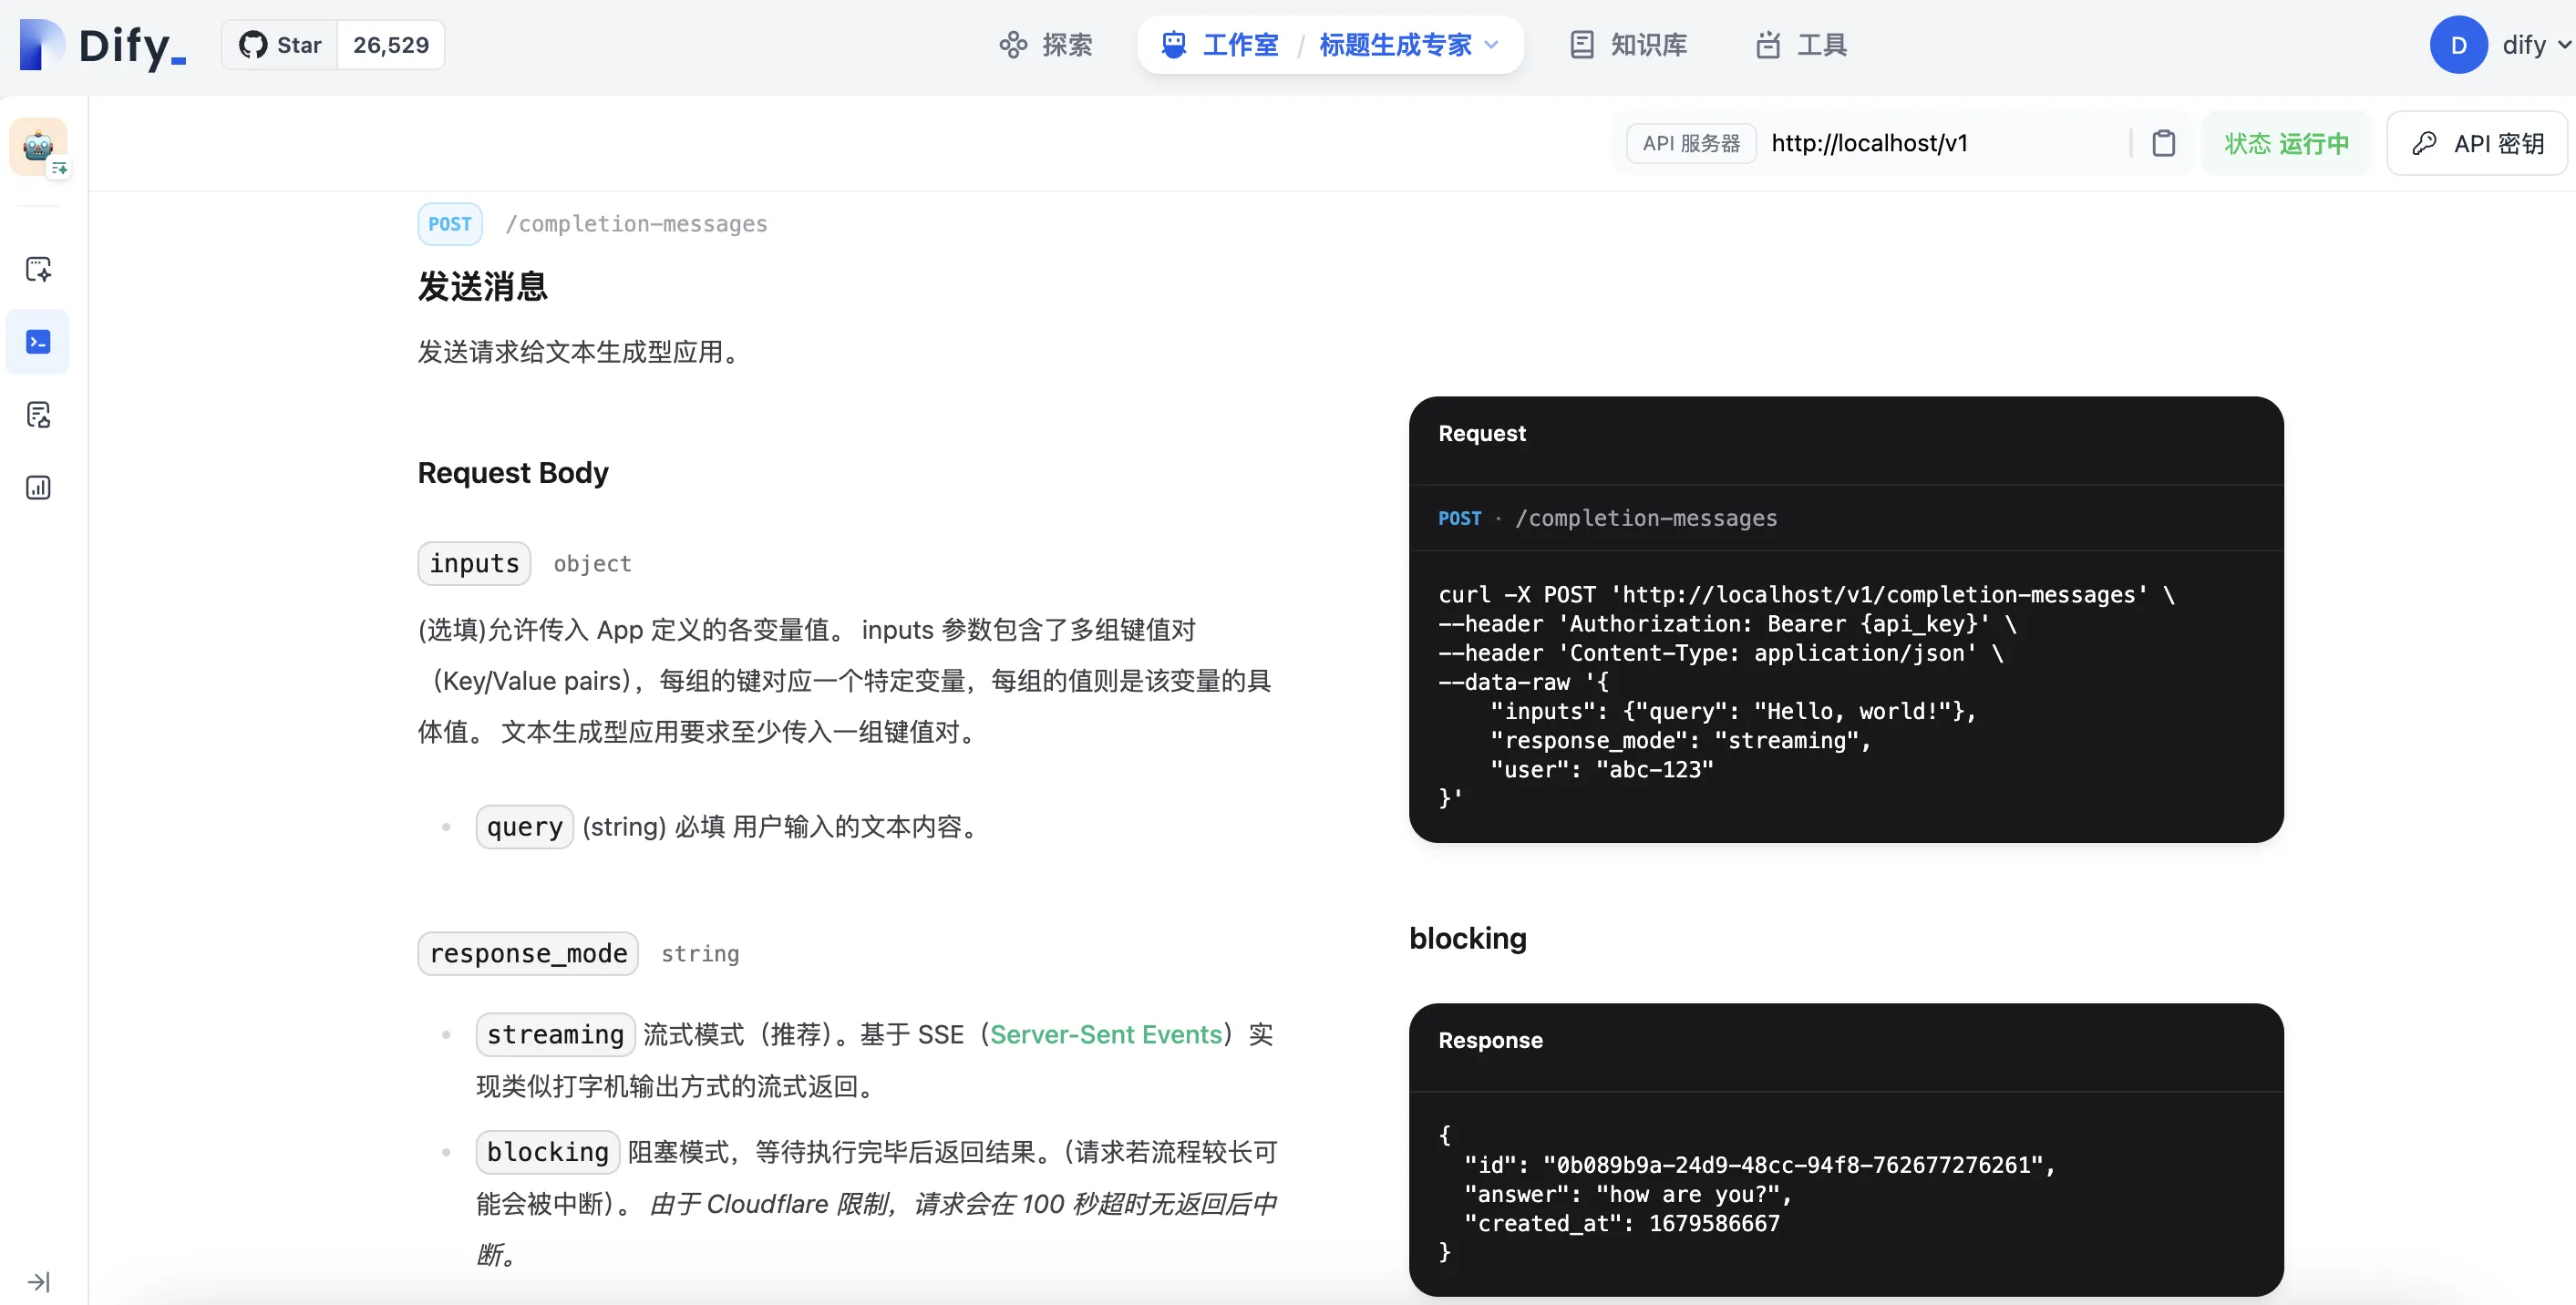
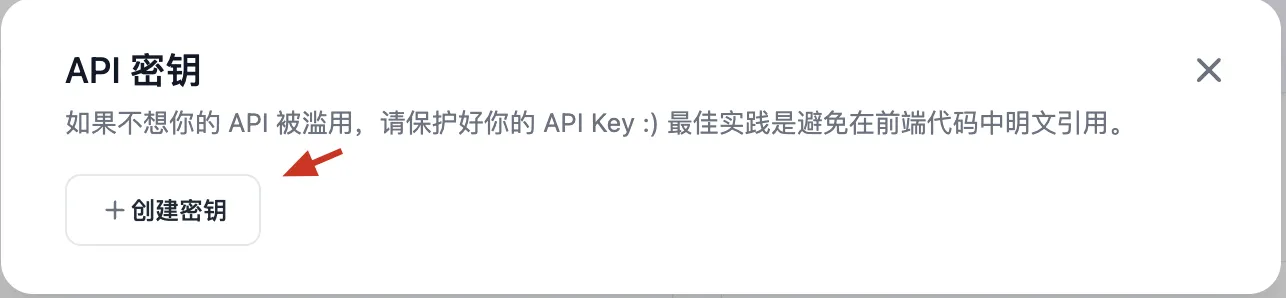
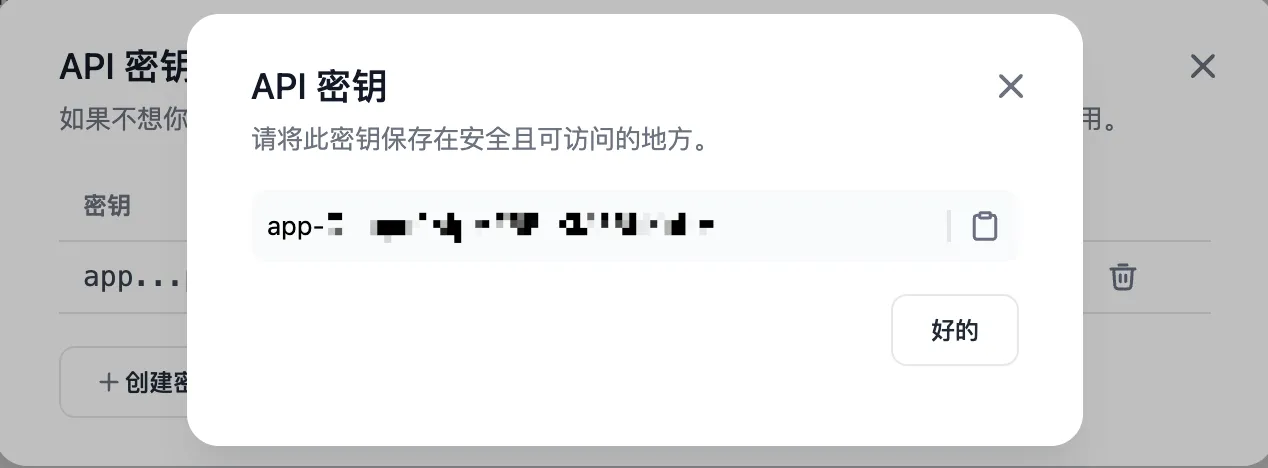
- 获取 API Key,用于调用 Dify API 的身份验证。
2.wordpress 侧的工作
wordpress 侧的工作主要是编写和安装插件(php 文件),调用 dify api 的标题生成能力。
- 创建一个 PHP 函数
generate_title_by_content,传入文章内容,返回模型生成的标题。 - 以下是一个简单的 PHP 函数
generate_title_by_content,它接受文章内容作为参数,并返回通过 API 调用生成的标题。 - 确保将
{api_key}替换为实际 API 密钥,并调整$content变量以包含希望生成标题的文章内容。
function generate_title_by_content($content) { $api_key = '{api_key}'; _// 替换为您的实际API密钥_ $user = 'abc-123'; _// 替换为您的用户标识_ $ch = curl_init(); // 本地调试用localhost,实际上传插件时地址需要改为host.docker.internal curl_setopt($ch, CURLOPT_URL, 'http://localhost:8082/v1/completion-messages'); //curl_setopt($ch, CURLOPT_URL, 'http://host.docker.internal:8082/v1/completion-messages'); curl_setopt($ch, CURLOPT_RETURNTRANSFER, true); curl_setopt($ch, CURLOPT_POST, true); curl_setopt($ch, CURLOPT_HTTPHEADER, [ "Authorization: Bearer $api_key", "Content-Type: application/json", ]); curl_setopt($ch, CURLOPT_POSTFIELDS, json_encode([ "inputs" => [ "query" => $content, ], "response_mode" => "streaming", "user" => $user, ])); $response = curl_exec($ch); curl_close($ch); $data = json_decode($response, true); if (isset($data['answer'])) { return $data['answer']; } else { return "标题生成失败"; } } _// 使用示例_ $content = "Hello, world!"; _// 您的文章内容_ $title = generate_title_by_content($content); echo $title; _// 输出生成的标题_
- 在 WordPress 中,使用
the_post钩子(https://developer.wordpress.org/reference/hooks/the_post/),当文章无标题时,调用该函数自动生成标题并更新数据库。
// 当文章发布或更新时,如果标题为空,自动生成一个标题 add_action("the_post", "update_post_title"); function update_post_title($post) { // 当标题存在,就不再生成 if (!empty($post->post_title)) { return; } // 生成标题 $post_title = generate_title_by_content($post->post_content); // 更新数据库中标题 wp_update_post(["ID" => $post->ID, "post_title" => $post_title]); // 更新当前文章对象 $post->post_title = $post_title; }
- 完整的插件代码如下,需要放置在 WordPress 插件目录并启用(下面有详细的插件安装指引)
- docker 环境安装的情况下:务必不要使用 http://localhost:8082 去访问 dify api,而应当使用宿主机的 IP 地址进行访问,即 http://host.docker.internal:8082(windows、mac 适用,linux 不确定;详见 3.5.3 节,搭建环境中的坑点相关内容)
<?php /* Plugin Name: 标题生成专家 Description: 根据文章内容生成标题 Version: 1.0 Author: jackley */ // // 避免直接访问 // if (!defined("ABSPATH")) { // die(); // } function generate_title_by_content($content) { $api_key = 'app-Oetcpd0AIpMFBBnKM3BbKpNV'; // 替换为您的实际API密钥 $user = 'test'; // 替换为您的用户标识 $ch = curl_init(); $post_data = json_encode([ "inputs" => [ "content" => $content, ], "response_mode" => "blocking", "user" => $user, ]); // curl_setopt($ch, CURLOPT_URL, 'http://localhost:8082/v1/completion-messages'); curl_setopt($ch, CURLOPT_URL, 'http://host.docker.internal:8082/v1/completion-messages'); curl_setopt($ch, CURLOPT_RETURNTRANSFER, true); curl_setopt($ch, CURLOPT_POST, true); curl_setopt($ch, CURLOPT_HTTPHEADER, [ "Authorization: Bearer $api_key", "Content-Type: application/json", ]); curl_setopt($ch, CURLOPT_POSTFIELDS, $post_data); $info = curl_getinfo($ch); $response = curl_exec($ch); if (curl_errno($ch)) { // 检查是否有CURL错误发生 die('Curl error: ' . curl_error($ch)); } curl_close($ch); $data = json_decode($response, true); if (empty($data["answer"])) { return "AI 生成标题失败 {$content}"; } $title = $data["answer"]; $title = str_replace('"', "", $title); // return $content."#".$info['url']."#".$post_data."#".$title; return $title; } // // 测试内容 // $content = "这是测试内容,用于生成标题。"; // // 调用函数并打印结果 // $title = generate_title_by_content($content); // echo "Generated Title: " . $title; function update_post_title($post) { // 当标题存在,就不再生成 if (!empty($post->post_title)) { return; } // 生成标题 $post_title = generate_title_by_content($post->post_content); // 更新数据库中标题 wp_update_post(["ID" => $post->ID, "post_title" => $post_title]); // 更新当前文章对象 $post->post_title = $post_title; } // 当文章发布或更新时,如果标题为空,自动生成一个标题 add_action("the_post", "update_post_title"); ?>
将 title-generate.php 安装为 wordpress 插件,可按照以下步骤操作:
- 本地编辑和保存
title-generate.php文件。 - 将
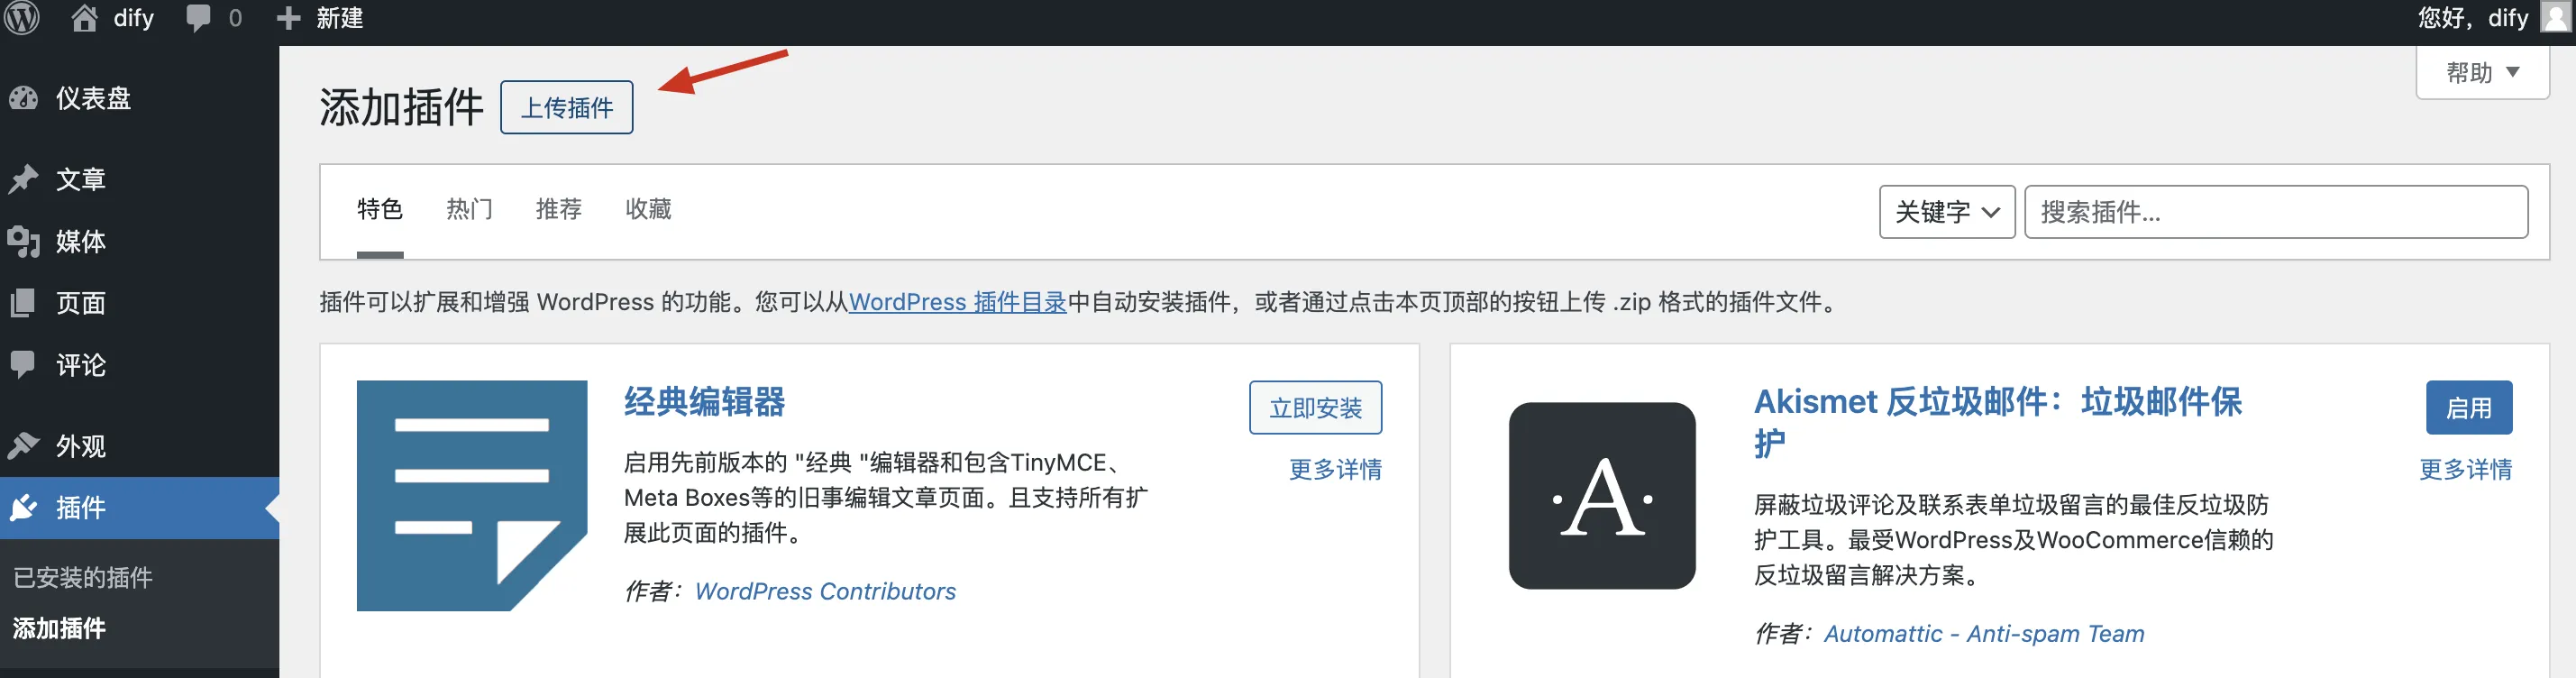
title-generate.php压缩为 zip 文件:title-generate.php.zip,因为 wordpress 插件只支持 zip 文件 - wordpress 插件页面,点击添加插件按钮
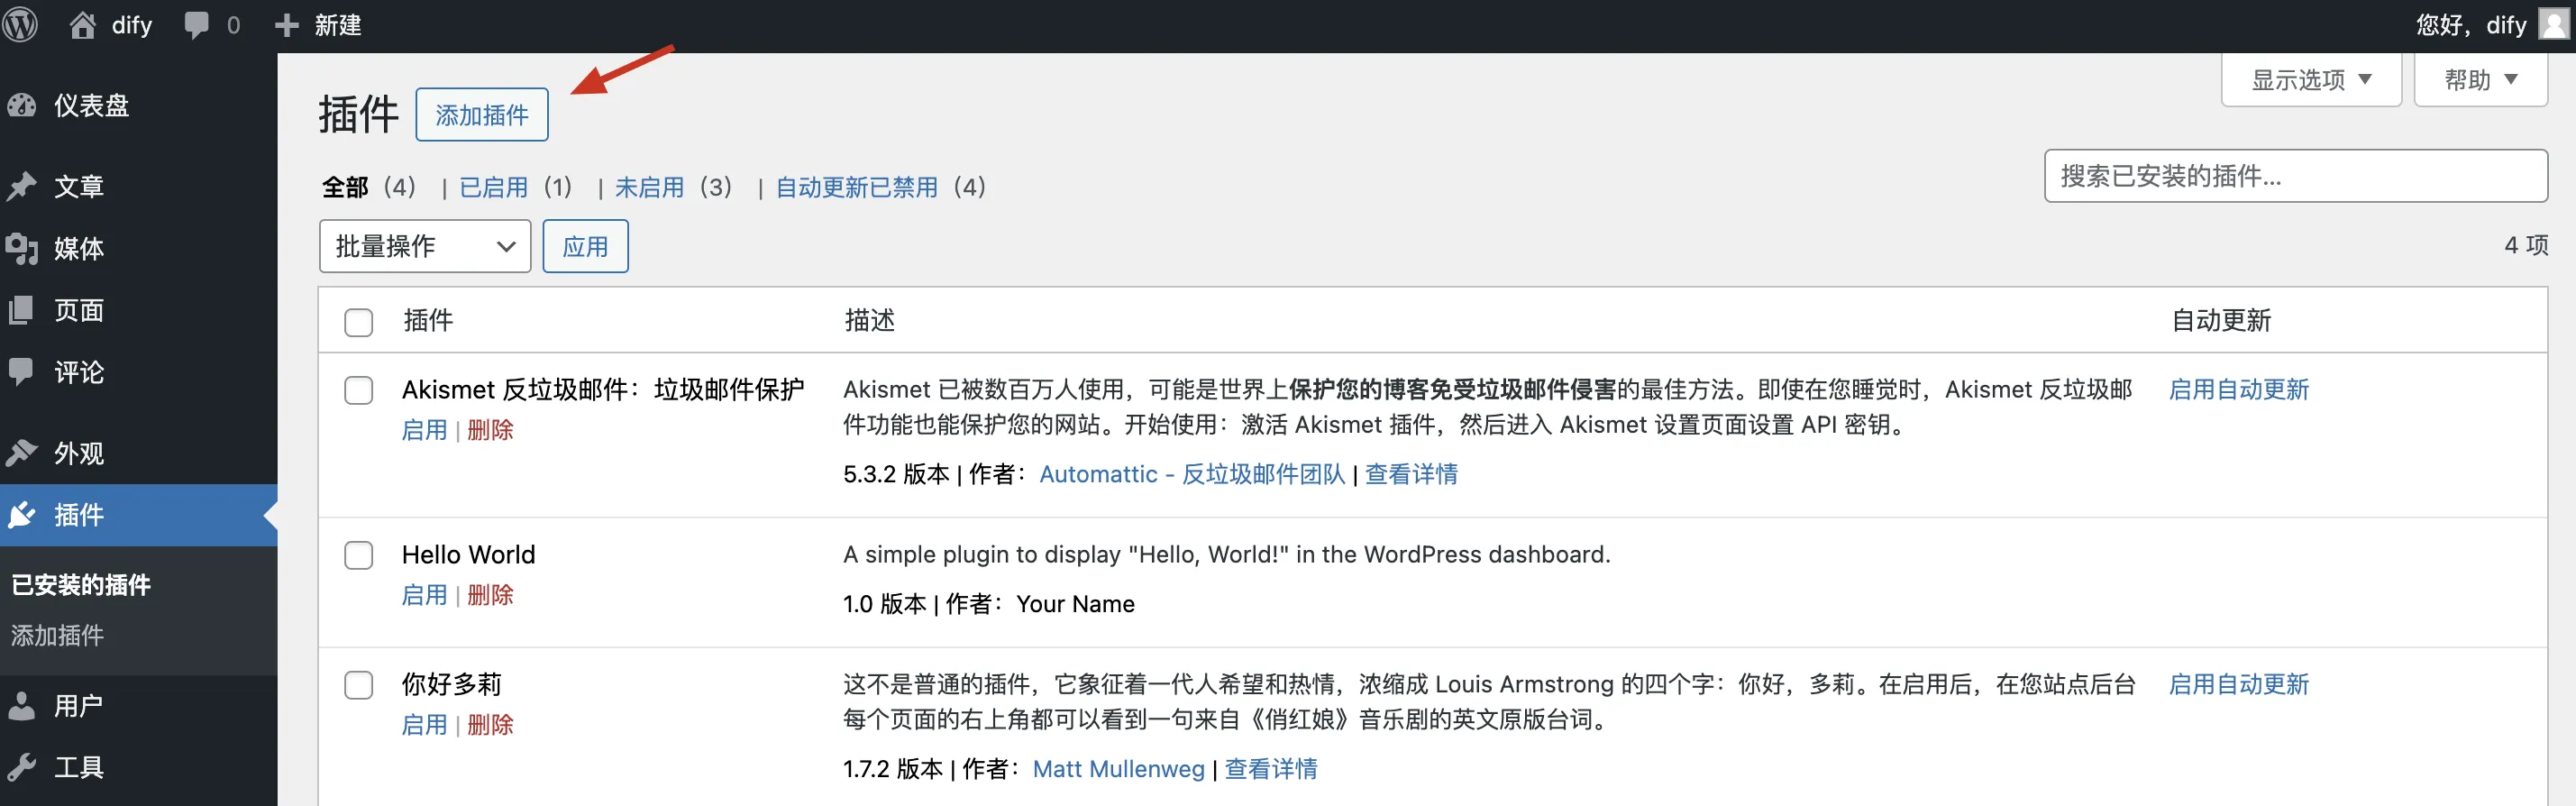
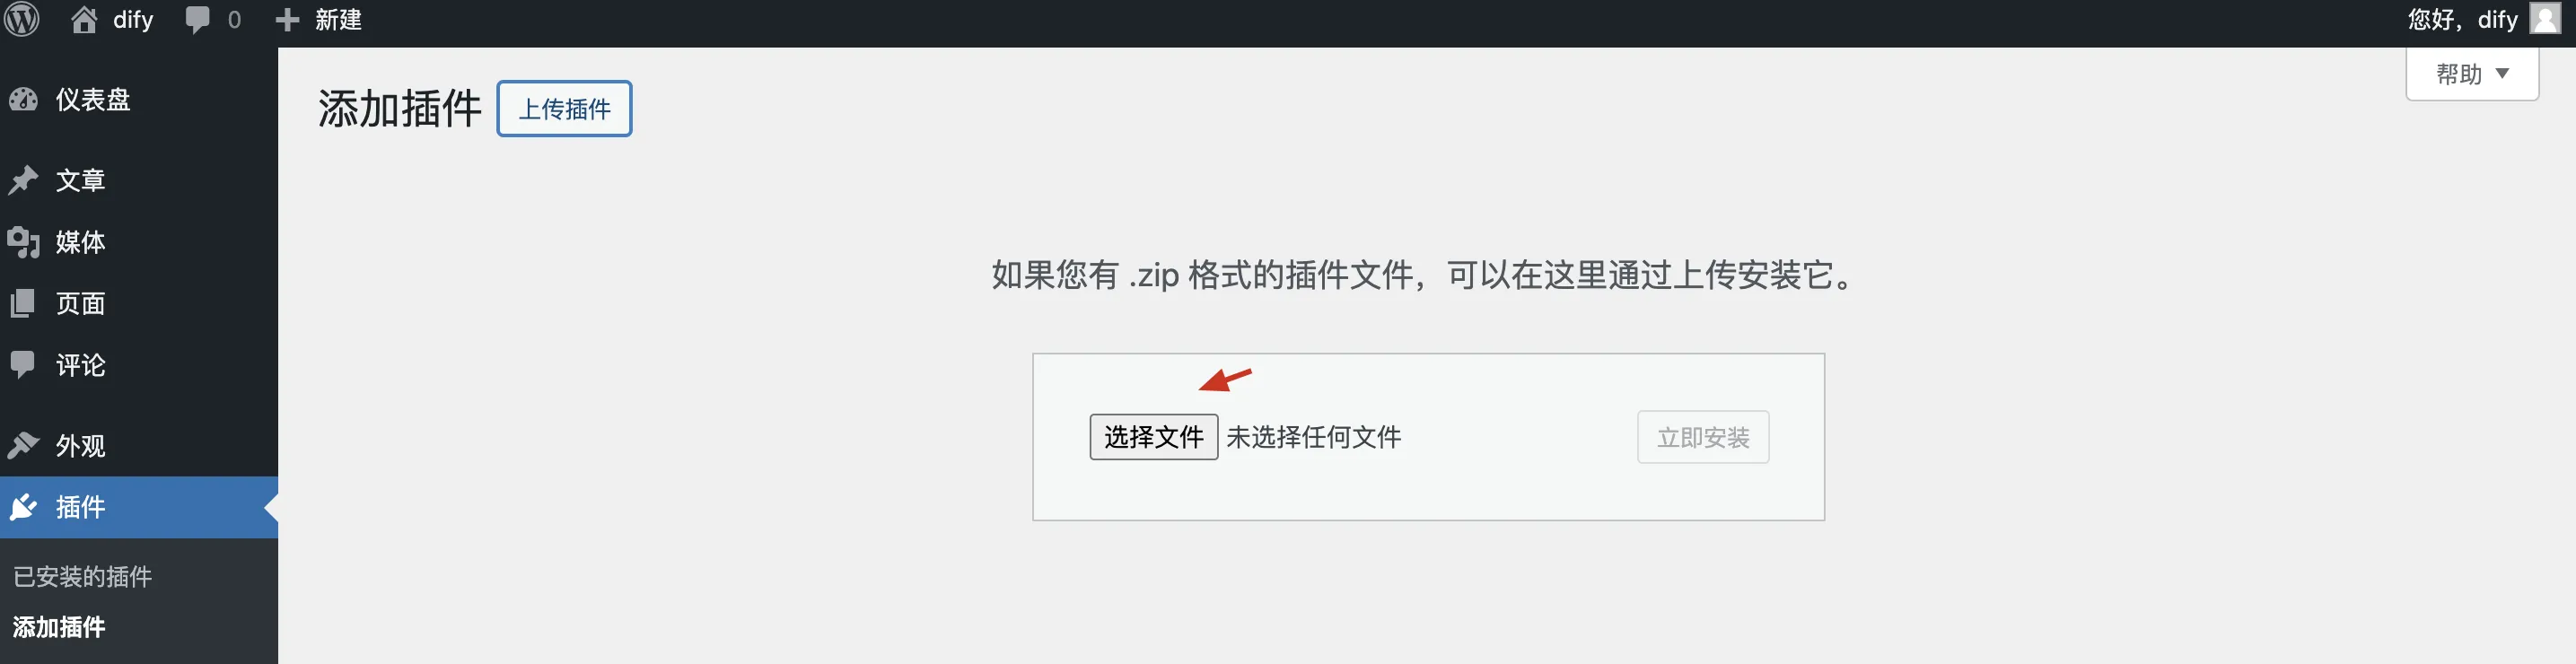
- 点击上传插件
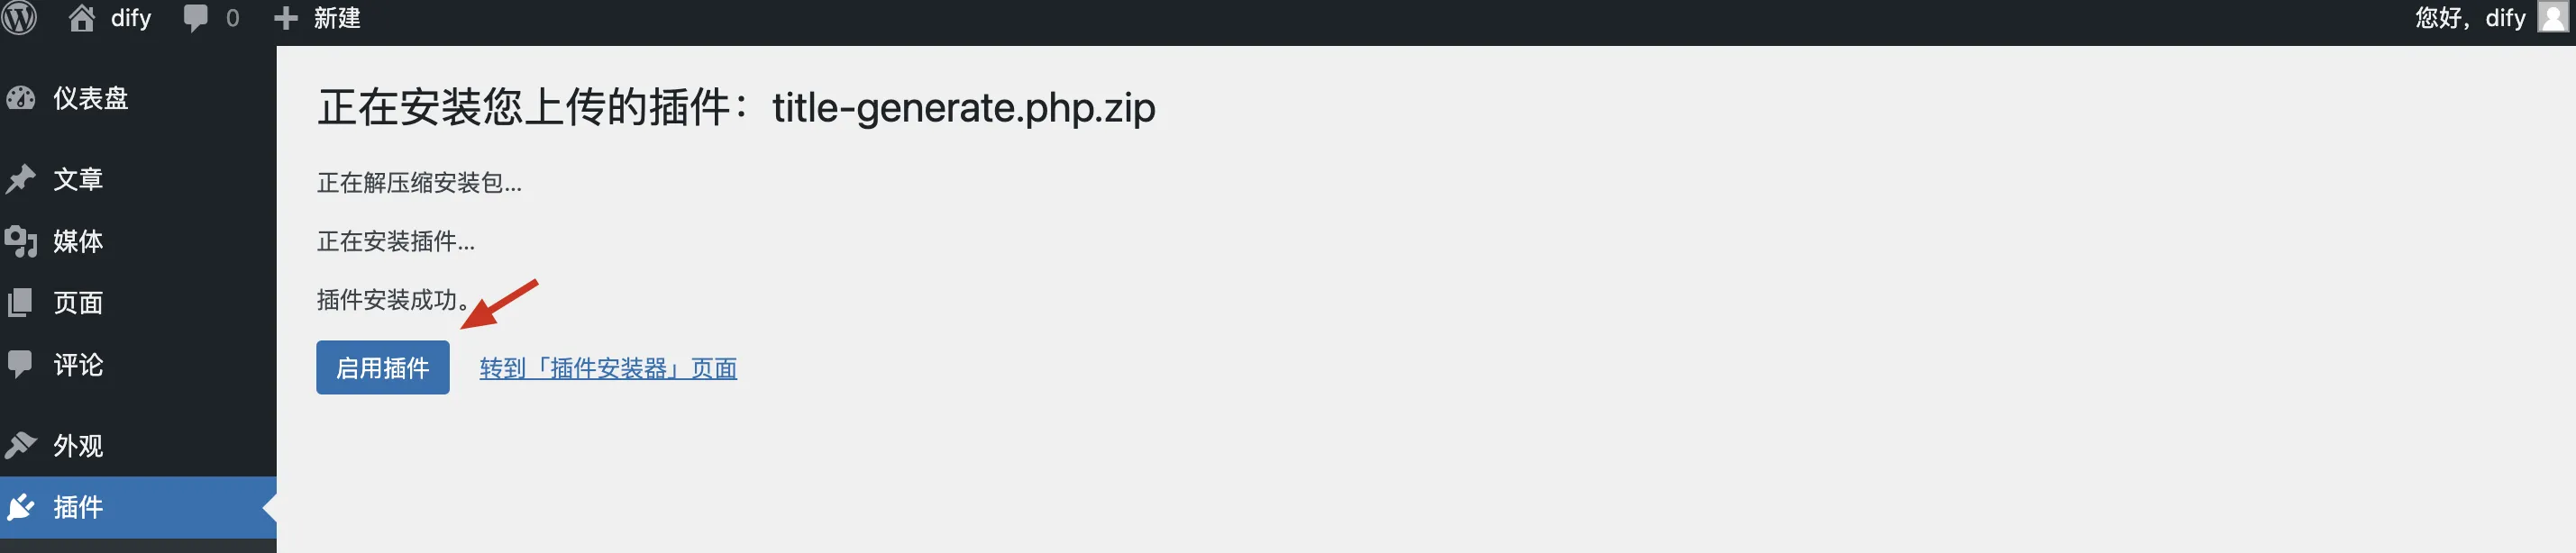
- 选择文件,上传刚刚生成的.zip 文件
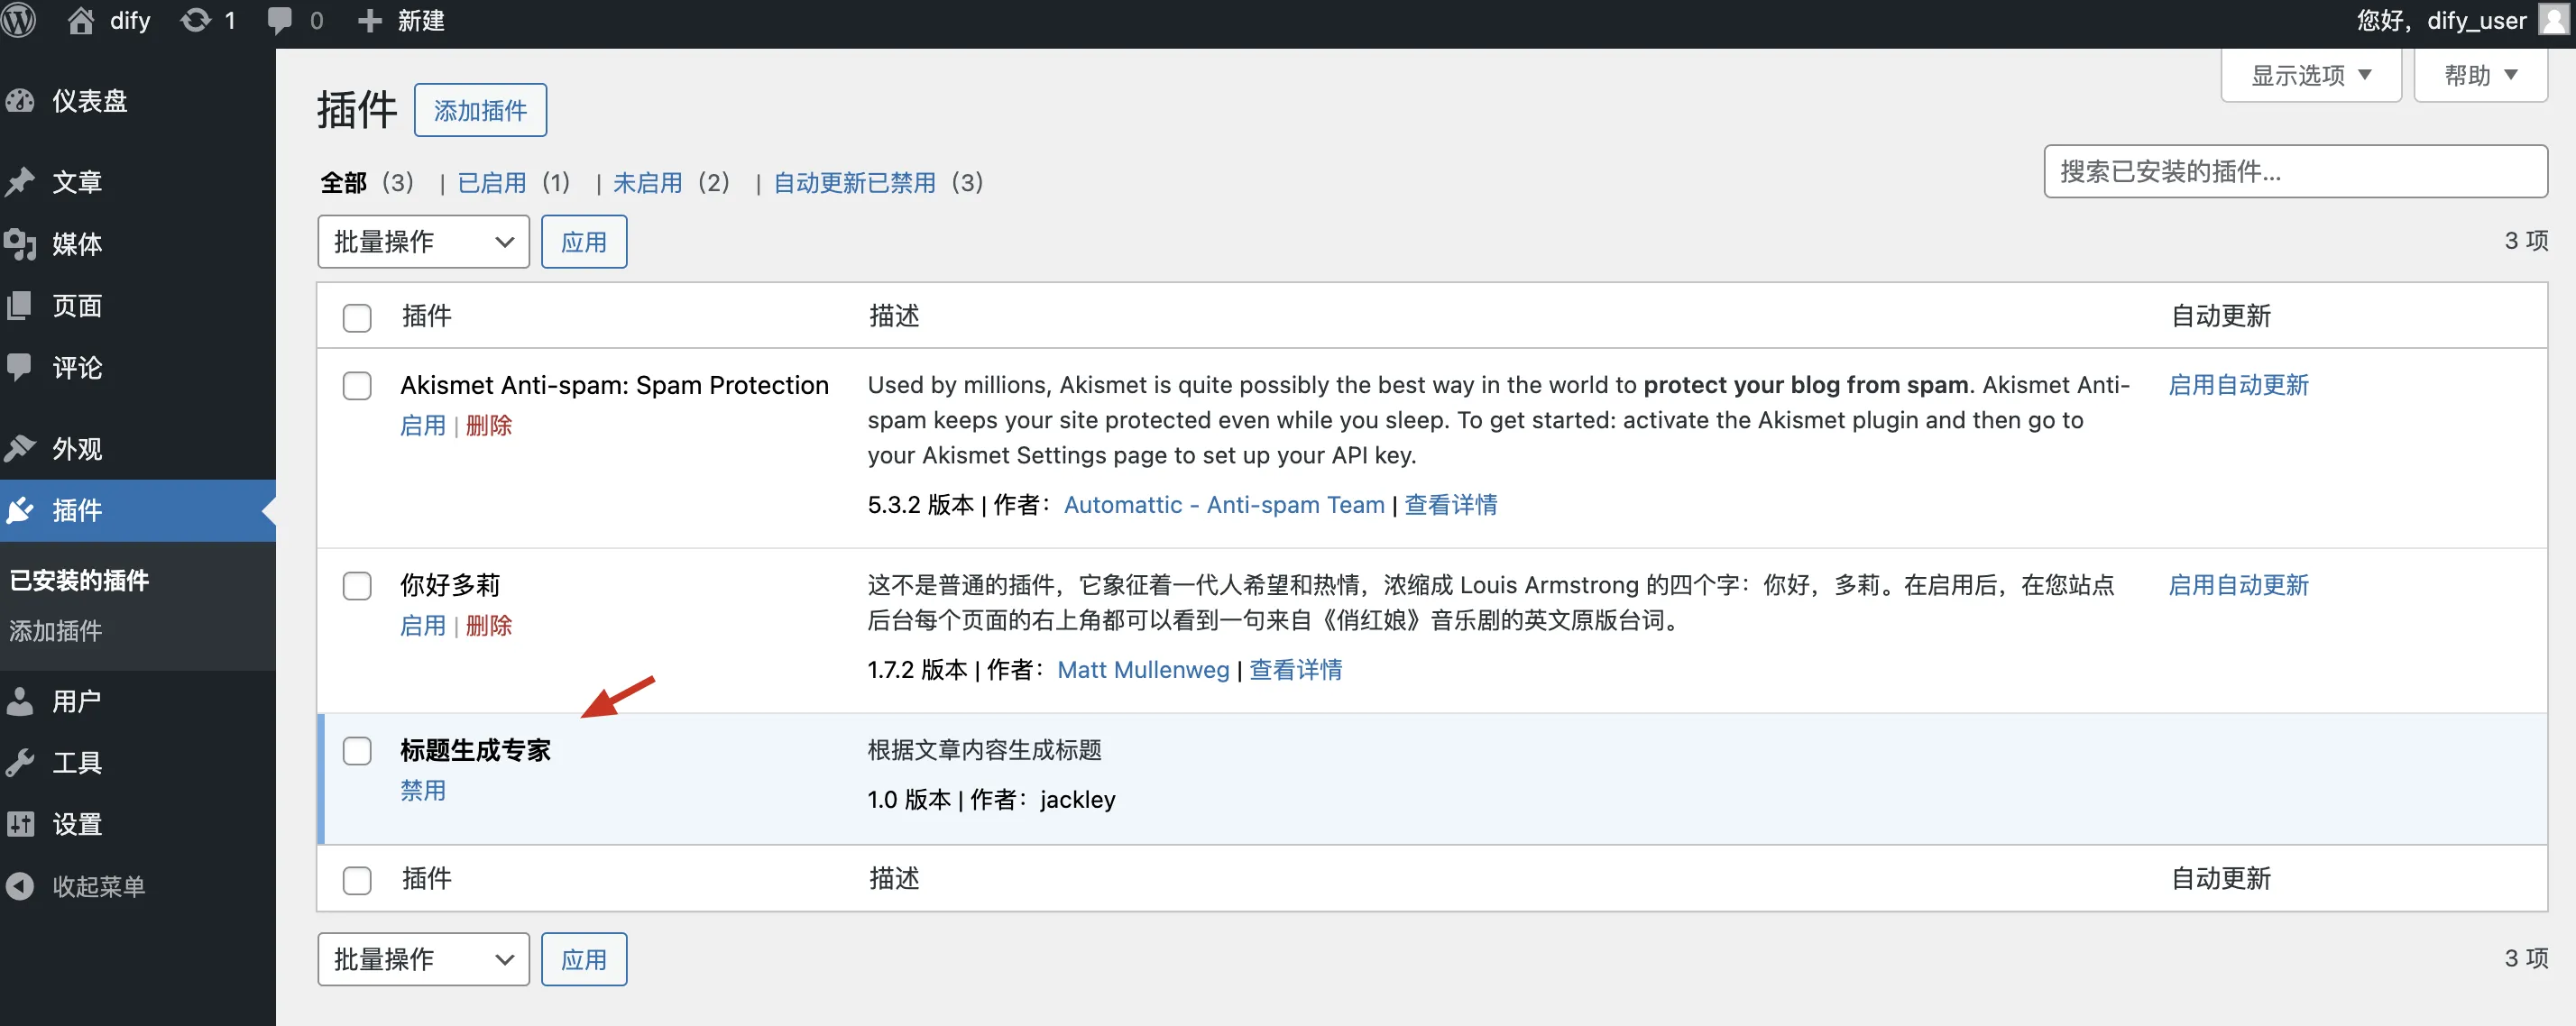
- 启用插件;回到已安装的插件页面,启用插件,即完成插件安装
3.测试 wordpress with dify
使用机器之心文章作为标题生成素材,选择另一篇文章复制内容。(比如:https://www.jiqizhixin.com/articles/2024-05-06-8)
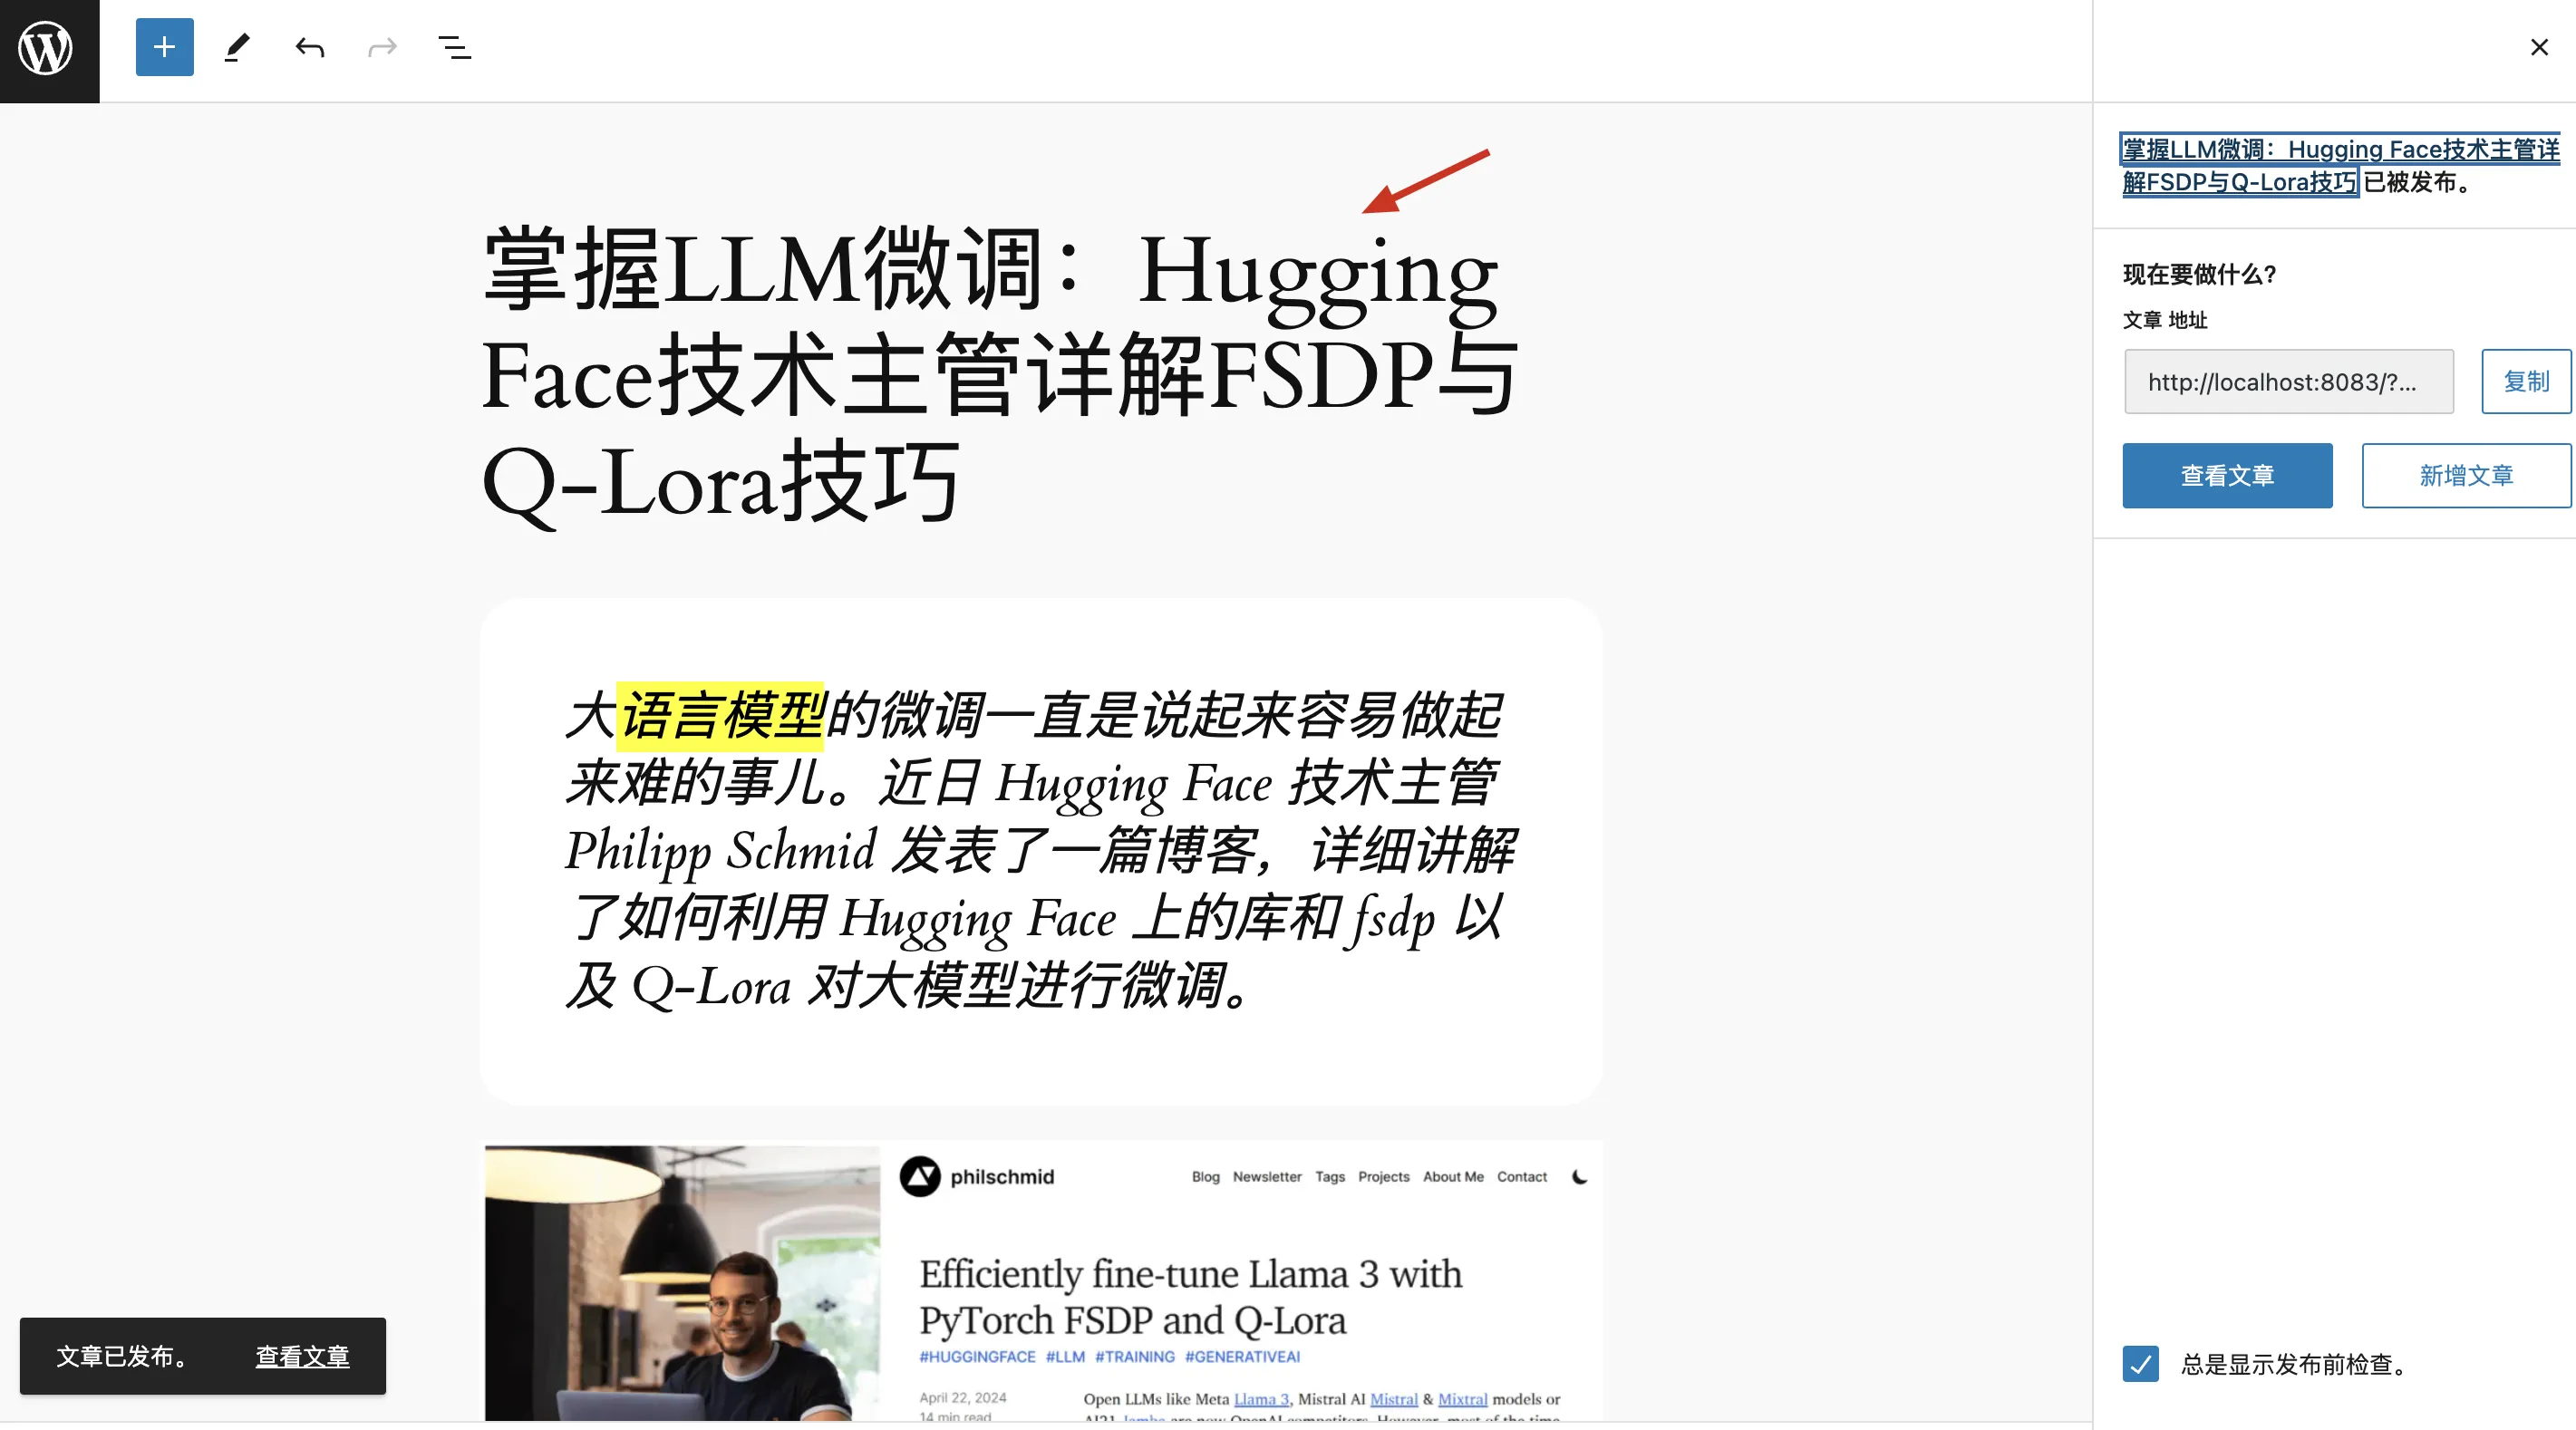
在 WordPress 中新建文章,粘贴复制的文章内容,留空标题区域。
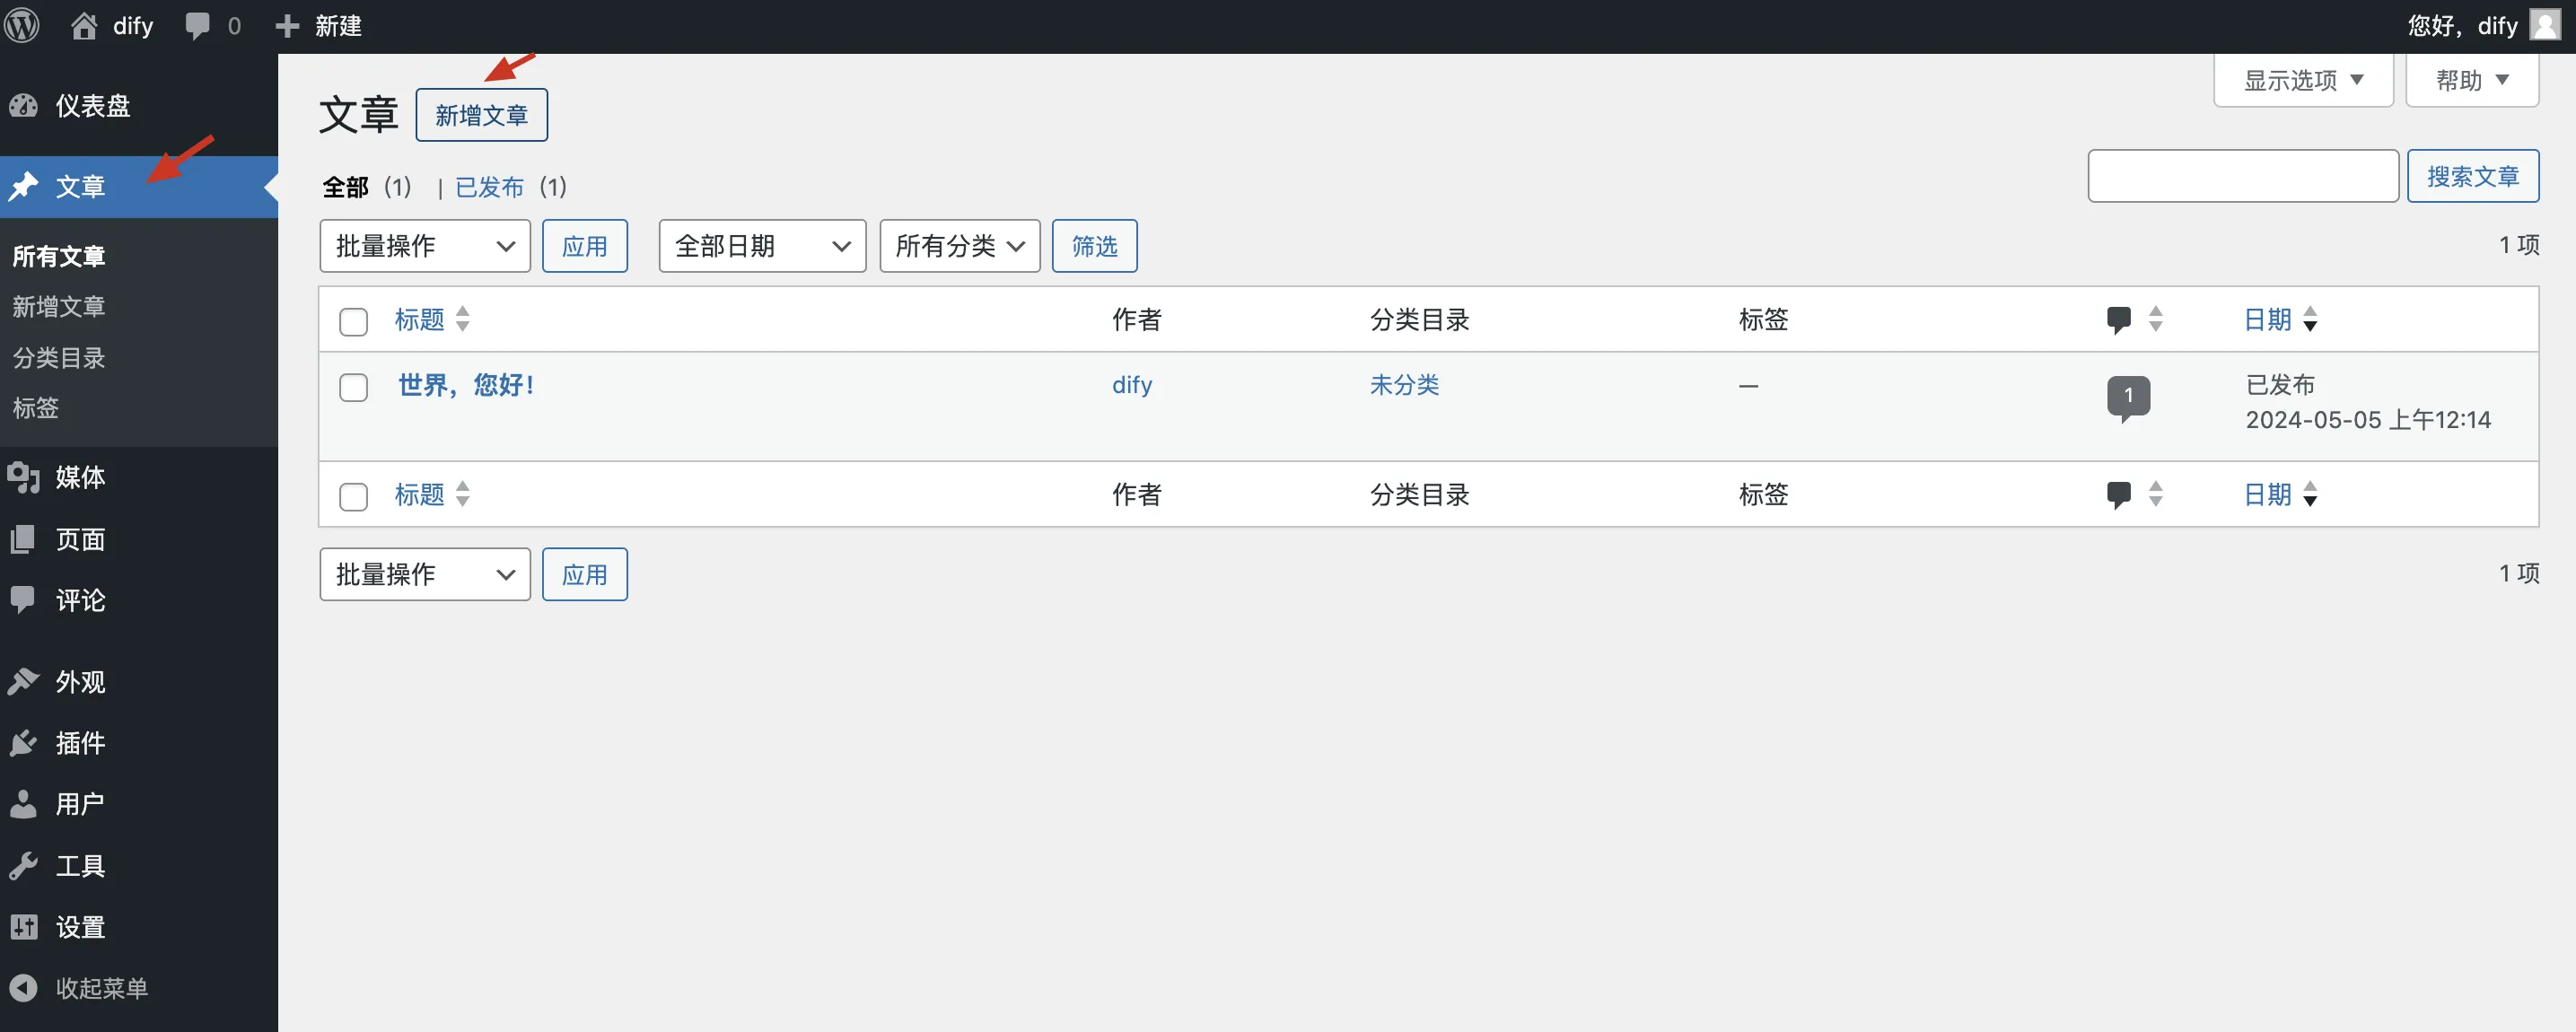
文章内容粘贴进去,标题部分留空。
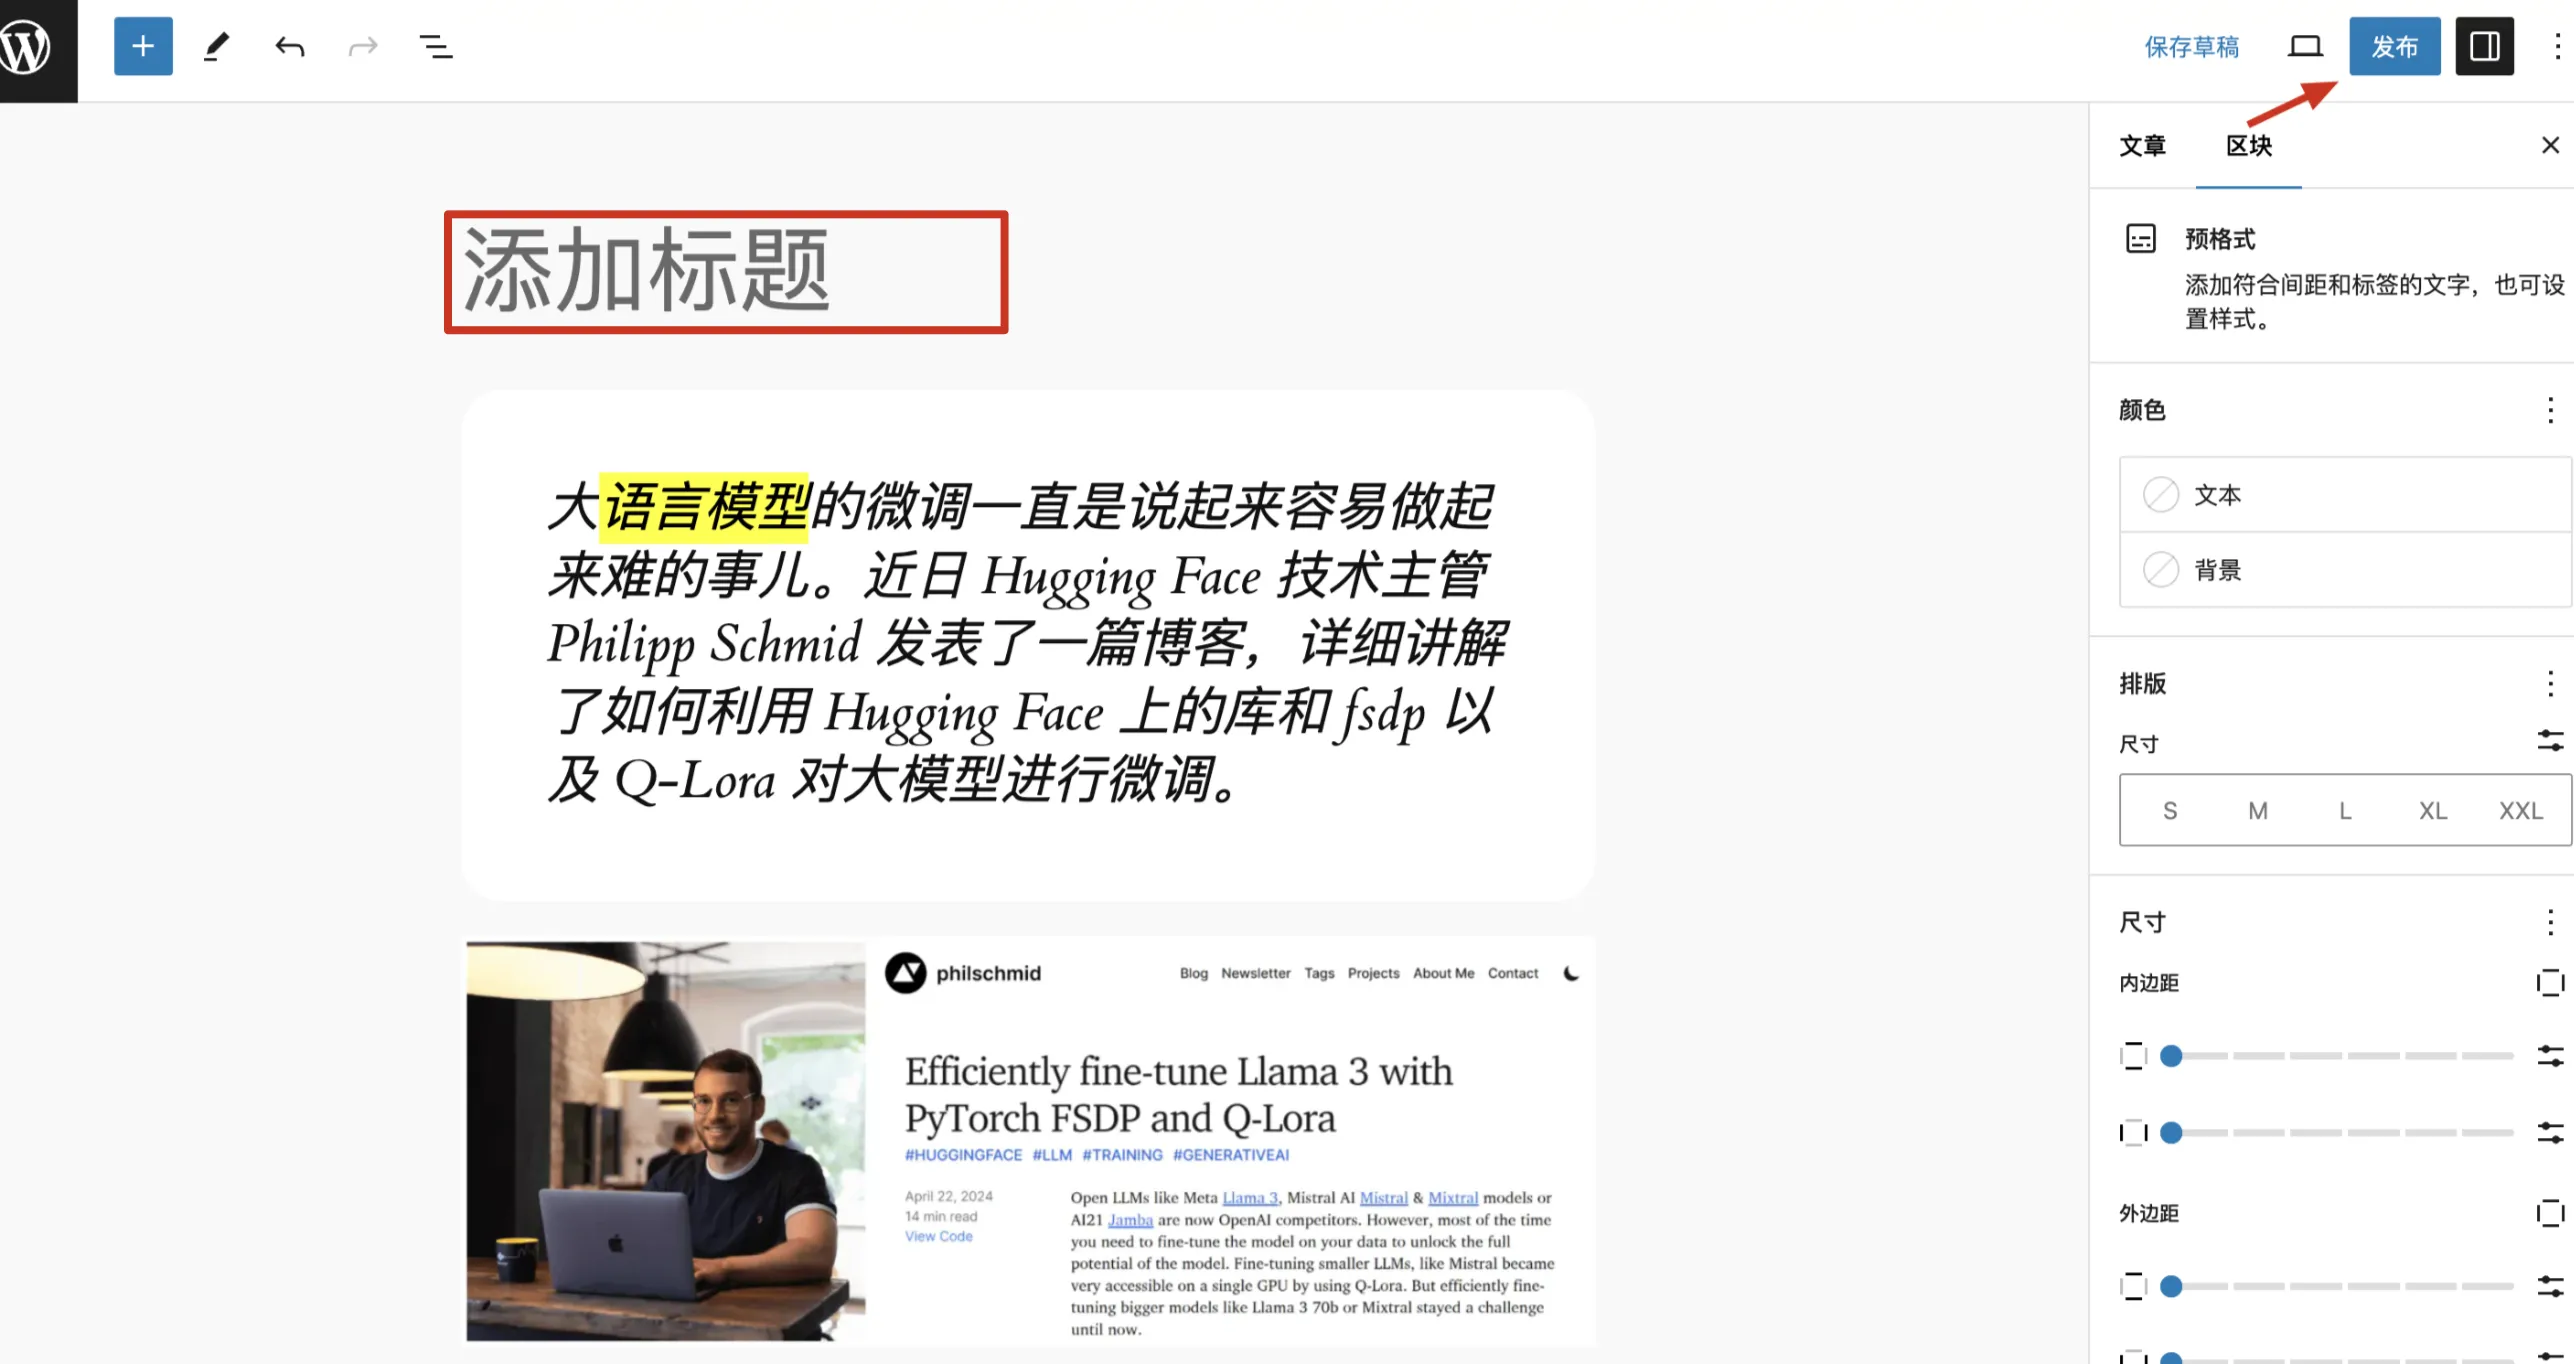
点击发布后,WordPress 将使用 Dify AI 生成标题,发送文章内容到 Dify api,返回的标题会自动填充到标题栏位;如需更新标题生成的风格,只需修改 dify 中的提示词即可。