WioTerminal
文档摘要
Wio Terminal Wio Terminal是由Seeed Studios制造的Arduino兼容微控制器,集成了WiFi以及一些传感器和执行器,并且有端口可以添加更多的传感器和执行器,这些都基于一个名为Grove的硬件生态系统。 Seeed Studios的Wio Terminal 设置 要使用你的Wio Terminal,你需要在电脑上安装一些免费软件。你还需要更新Wio Terminal固件才能连接到WiFi。 任务 - 设置 安装所需软件并更新固件。 安装Visual Studio Code(简称VS Code)。这是你将用来编写设备代码(C/C++)的编辑器。参考VS Code文档以获取安装说明。 另一个流行的Arduino开发IDE是Arduino IDE。
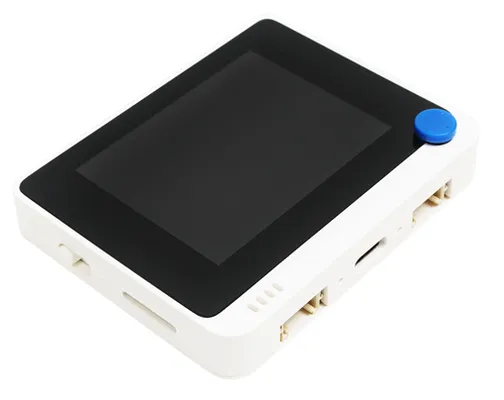
Wio Terminal
Wio Terminal是由Seeed Studios制造的Arduino兼容微控制器,集成了WiFi以及一些传感器和执行器,并且有端口可以添加更多的传感器和执行器,这些都基于一个名为Grove的硬件生态系统。
设置
要使用你的Wio Terminal,你需要在电脑上安装一些免费软件。你还需要更新Wio Terminal固件才能连接到WiFi。
任务 - 设置
安装所需软件并更新固件。
-
安装Visual Studio Code(简称VS Code)。这是你将用来编写设备代码(C/C++)的编辑器。参考VS Code文档以获取安装说明。
另一个流行的Arduino开发IDE是Arduino IDE。如果你已经熟悉这个工具,那么你可以用它代替VS Code和PlatformIO,但课程将基于使用VS Code提供指导。
-
安装VS Code的PlatformIO扩展。这是一个支持使用C/C++编程微控制器的VS Code扩展。参考PlatformIO扩展文档以获取在VS Code中安装此扩展的说明。该扩展依赖于Microsoft的C/C++扩展来处理C和C++代码,当你安装PlatformIO时,C/C++扩展会自动安装。
-
将你的Wio Terminal连接到电脑。Wio Terminal底部有一个USB-C接口,需要连接到电脑上的USB端口。Wio Terminal附带了一根USB-C到USB-A线缆,但如果电脑只有USB-C端口,则需要一根USB-C线缆或USB-A到USB-C适配器。
-
按照Wio Terminal Wiki WiFi概述文档中的说明设置Wio Terminal并更新固件。
Hello World
当开始学习一种新的编程语言或技术时,传统做法是创建一个“Hello World”应用程序——一个小应用输出像文本"Hello World"这样的内容,以显示所有工具配置正确。
Wio Terminal的Hello World应用将确保你已正确安装并配置了Visual Studio Code与PlatformIO,以进行微控制器开发。
创建PlatformIO项目
第一步是使用PlatformIO为Wio Terminal配置一个新的项目。
任务 - 创建PlatformIO项目
创建PlatformIO项目。
-
将Wio Terminal连接到电脑
-
启动VS Code
-
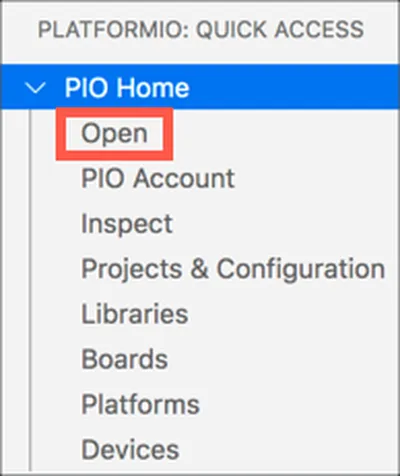
PlatformIO图标将在侧边菜单栏中:

选择此菜单项,然后选择PIO Home -> Open
-
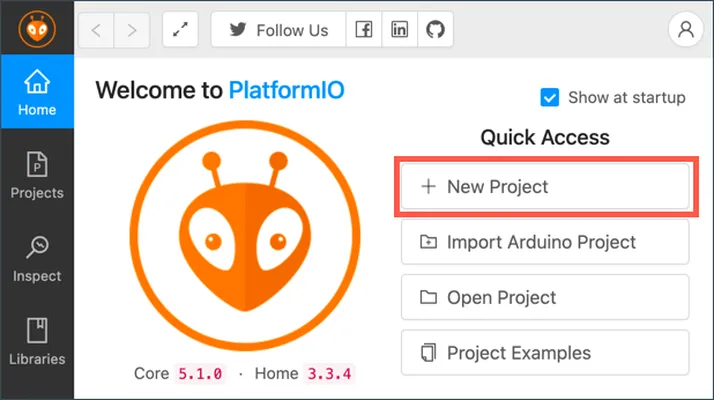
从欢迎屏幕中,选择**+ 新建项目**按钮
-
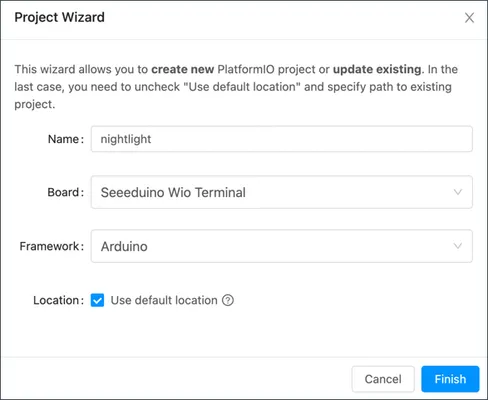
在项目向导中配置项目:
-
将项目命名为
nightlight -
在板子下拉列表中,输入
WIO以筛选板子,并选择Seeeduino Wio Terminal -
保持框架为Arduino
-
要么保持使用默认位置复选框被勾选,要么取消勾选并选择项目的位置
-
选择完成按钮
PlatformIO将下载编译Wio Terminal代码所需的组件并创建项目。这可能需要几分钟。
-
探索PlatformIO项目
VS Code资源管理器将显示由PlatformIO向导创建的一些文件和文件夹。
文件夹
.pio- 此文件夹包含PlatformIO所需的临时数据,如库或编译代码。如果删除,它将自动重新创建,如果你在GitHub等网站上共享项目,你不需要将其添加到源代码控制中。.vscode- 此文件夹包含PlatformIO和VS Code使用的配置。如果删除,它将自动重新创建,如果你在GitHub等网站上共享项目,你不需要将其添加到源代码控制中。include- 此文件夹用于在添加额外库到代码时所需的外部头文件。在这些课程中你不会使用这个文件夹。lib- 此文件夹用于你想从代码调用的外部库。在这些课程中你不会使用这个文件夹。src- 此文件夹包含你的应用程序的主要源代码。最初,它将包含一个文件 -main.cpp。test- 如果你有任何单元测试,可以将它们放在这个文件夹中。
文件
-
main.cpp- 此文件位于src文件夹中,包含你的应用程序的入口点。打开此文件,它将包含以下代码:#include <Arduino.h> void setup() { // put your setup code here, to run once: } void loop() { // put your main code here, to run repeatedly: }当设备启动时,Arduino框架将运行
setupfunction once, then run theloopfunction repeatedly until the device is turned off. -
.gitignore- this file lists the files and directories to be ignored when adding your code to git source code control, such as uploading to a repository on GitHub. -
platformio.ini- 这个文件包含你的设备和应用的配置。打开此文件,它将包含以下代码:[env:seeed_wio_terminal] platform = atmelsam board = seeed_wio_terminal framework = arduino[env:seeed_wio_terminal]section has configuration for the Wio Terminal. You can have multipleenvsections so your code can be compiled for multiple boards.The other values match the configuration from the project wizard:
platform = atmelsamdefines the hardware that the Wio Terminal uses (an ATSAMD51-based microcontroller)board = seeed_wio_terminaldefines the type of microcontroller board (the Wio Terminal)framework = arduino定义了该项目正在使用Arduino框架。
编写Hello World应用
现在你准备好编写Hello World应用了。
任务 - 编写Hello World应用
编写Hello World应用。
-
在VS Code中打开
main.cpp文件 -
将代码更改为以下内容:
#include <Arduino.h> void setup() { Serial.begin(9600); while (!Serial) ; // Wait for Serial to be ready delay(1000); } void loop() { Serial.println("Hello World"); delay(5000); }setupfunction initializes a connection to the serial port - in this case, the USB port that is used to connect the Wio Terminal to your computer. The parameter9600is the baud rate (also known as Symbol rate), or speed that data will be sent over the serial port in bits per second. This setting means 9,600 bits (0s and 1s) of data are sent each second. It then waits for the serial port to be ready.The
loopfunction sends the lineHello World!to the serial port, so the characters ofHello World!along with a new line character. It then sleeps for 5,000 milliseconds or 5 seconds. After theloopends, it is run again, and again, and so on all the time the microcontroller is powered on. -
Put your Wio Terminal into upload mode. You will need to do this every time you upload new code to the device:
-
Pull down twice quickly on the power switch - it will spring back to the on position each time.
-
Check the blue status LED to the right hand side of the USB port. It should be pulsing.
Click the image above for a video showing how to do this.
-
-
Build and upload the code to the Wio Terminal
-
Open the VS Code command palette
-
Type
PlatformIO Uploadto search for the upload option, and select PlatformIO: Upload
PlatformIO will automatically build the code if needed before uploading.
-
The code will be compiled and uploaded to the Wio Terminal
If you are using macOS, a notification about a DISK NOT EJECTED PROPERLY will appear. This is because the Wio Terminal gets mounted as a drive as part of the flashing process, and it is disconnected when the compiled code is written to the device. You can ignore this notification.
⚠️ If you get errors about the upload port being unavailable, first make sure you have the Wio Terminal connected to your computer, and switched on using the switch on the left hand side of the screen, and set into upload mode. The green light on the bottom should be on, and the blue light should be pulsing. If you still get the error, pull the on/off switch down twice in quick succession again to force the Wio Terminal into upload mode and try the upload again.
-
PlatformIO has a Serial Monitor that can monitor data sent over the USB cable from the Wio Terminal. This allows you to monitor the data sent by the Serial.println("Hello World"); command.
-
Open the VS Code command palette
-
Type
PlatformIO Serial找到Serial监视器选项,然后选择PlatformIO: Serial Monitor
新的终端将打开,并通过串行端口发送的数据将流式传输到此终端:
> Executing task: platformio device monitor < --- Available filters and text transformations: colorize, debug, default, direct, hexlify, log2file, nocontrol, printable, send_on_enter, time --- More details at http://bit.ly/pio-monitor-filters --- Miniterm on /dev/cu.usbmodem101 9600,8,N,1 --- --- Quit: Ctrl+C | Menu: Ctrl+T | Help: Ctrl+T followed by Ctrl+H --- Hello World Hello WorldHello World每5秒打印到串行监视器。
你可以在code/wio-terminal文件夹中找到此代码。
你的“Hello World”程序成功了!
声明:
本文件灏天文库团队进行了翻译。尽管我们力求准确,但请注意,翻译可能包含错误或不准确之处。原文档以其原始语言为准。我们不对因使用此翻译而产生的任何误解或误译负责。