22.1Physx实例-小球掉落
文档摘要
## 22.1 Physx实例-小球掉落 Physx自带了多个实例来介绍API的使用,不过我觉得还是太过复杂,所以本小节用一个最简单的例子:小球掉落,来介绍Physx的初始化、以及可视化工具PVD(PhysX Visual Debugger)的使用。 Physx API文档位于: 小球掉落这个实例,流程如下: 初始化Physx 在创建Foundation实例,需要指定内存申请器(gAllocator)与错误回调(gErrorCallback)。 这里是使用了Physx自带的: 1.1 内存申请器 内存申请,每个平台都有不一样的实现,这里看下Windows下的实现。 1.2 错误回调 定义: 实现: 默认的实现是直接输出错误。 一般在项目中要继承 自己实现 ,将Log上传到服务器。
22.1 Physx实例-小球掉落
CLion项目文件位于 samples\physx\hello_physx
Physx自带了多个实例来介绍API的使用,不过我觉得还是太过复杂,所以本小节用一个最简单的例子:小球掉落,来介绍Physx的初始化、以及可视化工具PVD(PhysX Visual Debugger)的使用。
Physx API文档位于:physx/documentation/PhysXGuide/Manual/API.html
小球掉落这个实例,流程如下:
//file:example/main.cpp line:121 int main() { //~en Init Physx //~zh 初始化Physx InitPhysics(); //~en Create Scene //~zh 创建Scene CreateScene(); //~en Create Plane,add to scene. //~zh 创建地板 CreatePlane(); //~en Create ball //~zh 创建球 CreateBall(); //~en simulate game engine update //~zh 模拟游戏引擎update Simulate(); CleanupPhysics(); return 0; }
1. 初始化Physx
//file:example/main.cpp line:25 //~en Init Physx //~zh 初始化Physx void InitPhysics() { //~en Creates an instance of the foundation class,.only one instance per process. //~zh 创建Foundation实例。 gFoundation = PxCreateFoundation(PX_PHYSICS_VERSION, gAllocator, gErrorCallback); //~en Connect to pvd(PhysX Visual Debugger). //~zh 连接PVD gPvd = PxCreatePvd(*gFoundation); PxPvdTransport* transport = PxDefaultPvdSocketTransportCreate("127.0.0.1", 5425, 10); gPvd->connect(*transport,PxPvdInstrumentationFlag::eALL); //~en Creates an instance of the physics SDK. //~zh 创建Physx SDK实例 gPhysics = PxCreatePhysics(PX_PHYSICS_VERSION, *gFoundation, PxTolerancesScale(),true,gPvd); }
在创建Foundation实例,需要指定内存申请器(gAllocator)与错误回调(gErrorCallback)。
这里是使用了Physx自带的:
//file:example/main.cpp line:9 PxDefaultAllocator gAllocator; PxDefaultErrorCallback gErrorCallback;
1.1 内存申请器
内存申请,每个平台都有不一样的实现,这里看下Windows下的实现。
//file:physx\include\extensions\PxDefaultAllocator.h line:89 /** \brief default implementation of the allocator interface required by the SDK */ class PxDefaultAllocator : public PxAllocatorCallback { public: void* allocate(size_t size, const char*, const char*, int) { void* ptr = platformAlignedAlloc(size); PX_ASSERT((reinterpret_cast<size_t>(ptr) & 15)==0); return ptr; } void deallocate(void* ptr) { platformAlignedFree(ptr); } };
1.2 错误回调
PxDefaultErrorCallback 定义:
//file:physx\include\extensions\PxDefaultErrorCallback.h class PxDefaultErrorCallback : public PxErrorCallback { public: PxDefaultErrorCallback(); ~PxDefaultErrorCallback(); virtual void reportError(PxErrorCode::Enum code, const char* message, const char* file, int line); };
PxDefaultErrorCallback 实现:
//file:physx\source\physxextensions\src\ExtDefaultErrorCallback.cpp line:40 PxDefaultErrorCallback::PxDefaultErrorCallback() { } PxDefaultErrorCallback::~PxDefaultErrorCallback() { } void PxDefaultErrorCallback::reportError(PxErrorCode::Enum e, const char* message, const char* file, int line) { const char* errorCode = NULL; switch (e) { case PxErrorCode::eNO_ERROR: errorCode = "no error"; break; case PxErrorCode::eINVALID_PARAMETER: errorCode = "invalid parameter"; break; case PxErrorCode::eINVALID_OPERATION: errorCode = "invalid operation"; break; case PxErrorCode::eOUT_OF_MEMORY: errorCode = "out of memory"; break; case PxErrorCode::eDEBUG_INFO: errorCode = "info"; break; case PxErrorCode::eDEBUG_WARNING: errorCode = "warning"; break; case PxErrorCode::ePERF_WARNING: errorCode = "performance warning"; break; case PxErrorCode::eABORT: errorCode = "abort"; break; case PxErrorCode::eINTERNAL_ERROR: errorCode = "internal error"; break; case PxErrorCode::eMASK_ALL: errorCode = "unknown error"; break; } PX_ASSERT(errorCode); if(errorCode) { char buffer[1024]; sprintf(buffer, "%s (%d) : %s : %s\n", file, line, errorCode, message); physx::shdfnd::printString(buffer); // in debug builds halt execution for abort codes PX_ASSERT(e != PxErrorCode::eABORT); // in release builds we also want to halt execution // and make sure that the error message is flushed while (e == PxErrorCode::eABORT) { physx::shdfnd::printString(buffer); physx::shdfnd::Thread::sleep(1000); } } }
默认的实现是直接输出错误。
一般在项目中要继承PxErrorCallback自己实现reportError,将Log上传到服务器。
2. 创建Scene
//file:example/main.cpp line:44 //~en Create Scene //~zh 创建Scene void CreateScene(){ PxSceneDesc sceneDesc(gPhysics->getTolerancesScale()); sceneDesc.gravity = PxVec3(0.0f, -9.81f, 0.0f); gDispatcher = PxDefaultCpuDispatcherCreate(2); sceneDesc.cpuDispatcher = gDispatcher; sceneDesc.filterShader = PxDefaultSimulationFilterShader; gScene = gPhysics->createScene(sceneDesc); PxPvdSceneClient* pvdClient = gScene->getScenePvdClient(); if(pvdClient) { pvdClient->setScenePvdFlag(PxPvdSceneFlag::eTRANSMIT_CONSTRAINTS, true); pvdClient->setScenePvdFlag(PxPvdSceneFlag::eTRANSMIT_CONTACTS, true); pvdClient->setScenePvdFlag(PxPvdSceneFlag::eTRANSMIT_SCENEQUERIES, true); } }
Scene是容器,后面创建的地板、小球都要添加到Scene中。
需要对Scene设置一系列参数,例如设置重力为9.81:
sceneDesc.gravity = PxVec3(0.0f, -9.81f, 0.0f);
Physx内部是多线程的,在下面代码里可以设置工作线程数量,这里设置为2.
gDispatcher = PxDefaultCpuDispatcherCreate(2);
如果设置为0,这样所有的工作都会在调用PxScene::simulate()的线程执行。
线程切换是很耗时的,如果项目中的物理模拟运算不多,可能物理模拟运算的耗时还赶不上线程切换的耗时。
那么就可以将线程设置为0,直接在主线程进行物理模拟。
3. 创建地板
//file:example/main.cpp line:63 //~en Create Plane,add to scene. //~zh 创建地板 void CreatePlane(){ //~en Create Physx Material. //~zh 创建物理材质 gMaterial = gPhysics->createMaterial(0.5f, 0.5f, 0.6f); //~en Create Plane,add to scene. //~zh 创建地板 PxRigidStatic* groundPlane = PxCreatePlane(*gPhysics, PxPlane(0,1,0,0), *gMaterial); gScene->addActor(*groundPlane); }
创建物理材质?看到这个会不会联想到前面讲的模型材质?
所谓材质,就是一系列属性的集合。
模型材质,是渲染这个模型所需要的一系列属性的集合,例如指定贴图、颜色。
物理材质,就是物体用于物理计算所需要的一系列属性的集合,例如摩擦系数、弹性系数,后面再详细介绍。
4. 创建球
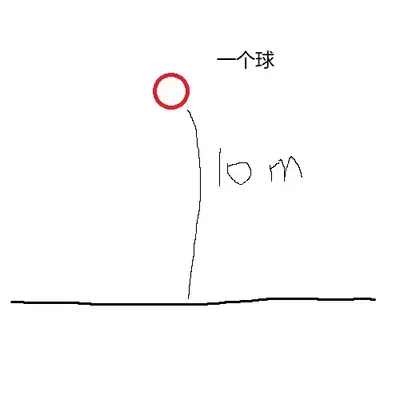
//file:example/main.cpp line:76 //~en Create ball //~zh 创建球 void CreateBall(){ //~en Create RigidBody,pos is (0,10,0) //~zh 创建刚体,坐标是 (0,10,0) PxRigidDynamic* body = gPhysics->createRigidDynamic(PxTransform(PxVec3(0, 10, 0))); //~en Set rigidbody sharp //~zh 设置刚体形状,一个球。 float radius = 0.5f; PxShape* shape = gPhysics->createShape(PxSphereGeometry(radius), *gMaterial); body->attachShape(*shape); shape->release(); //~en calculate mass,mass = volume * density //~zh 根据体积、密度计算质量 PxRigidBodyExt::updateMassAndInertia(*body, 10.0f); gScene->addActor(*body); }
先创建刚体,再给刚体一个小球形状,就有了小球刚体。

指定球的密度后,就可以用体积*密度算出质量了。
+PxRigidDynamic表示动态的刚体模拟对象,其继承自PxRigidBody,PxRigidBody继承自PxRigidActor。 -PxRigidStatic 仅表示一个静态物理实体,继承自PxRigidActor。 这两个是物理世界对象的基础节点。
5. 模拟游戏引擎update
//file:example/main.cpp line:97 //~en simulate game engine update //~zh 模拟游戏引擎update void Simulate(){ static const PxU32 frameCount = 10000; for(PxU32 i=0; i<frameCount; i++) { gScene->simulate(1.0f/60.0f); gScene->fetchResults(true); } }
调用gScene->simulate(1.0f/60.0f);开始模拟后,Physx内部多个工作线程就开始计算。
调用gScene->fetchResults(true);等待计算结果。
6. 使用PVD查看小球掉落效果
CLion直接运行项目,发现只有控制台输出了SnippetHelloWorld done.,说好的球下落没有了。
没办法,作为一个最简单的实例,画面是不可能有的。
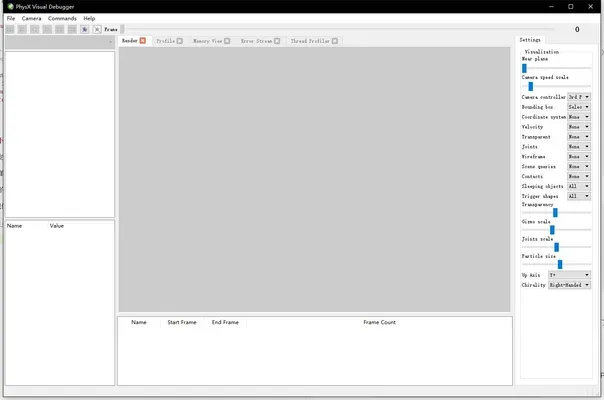
那如何去查看小球下落的效果呢,这个时候就要用到PVD(PhysX Visual Debugger)了。
PVD是Physx提供的可视化调试器,先启动PVD,然后再运行项目,连接成功后,项目中的Physx数据就会发送到PVD中。
PVD下载地址:https://developer.nvidia.com/physx-visual-debugger
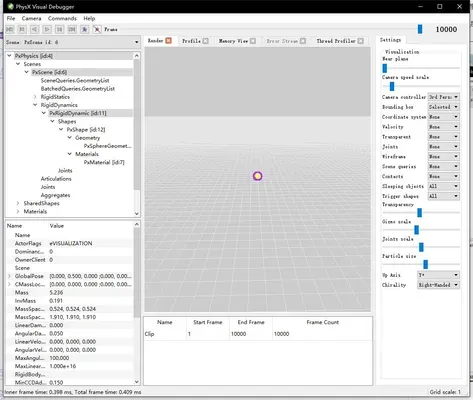
先启动PVD。
然后启动项目。

在PVD中可以看到小球,小球一瞬间就掉下去了。
为什么没有慢慢往下掉呢,这是因为在实例中是简单的for循环模拟帧,每一帧并没有1.0f/60.0f的时间间隔。
PVD中的数据是支持回放的,PVD左上角的控制按钮,分别是回到第一帧,上一帧、倒放、播放、下一帧、最后一帧。
先点击回到第一帧,再点击播放,就可以看到小球掉落的过程。

选中小球,在左侧就会显示小球属性。
其他的功能就慢慢探索吧。